1 Gate Hub, 2 Gates: Dual UniFi Access Control Setup
Optimizing physical security infrastructure requires a balance between high-end performance and resource efficiency. On a recent deployment, our team at YesTechie was tasked with installing a modern security perimeter for a commercial client featuring two separate entry points: an employee parking gate and a dedicated delivery gate.
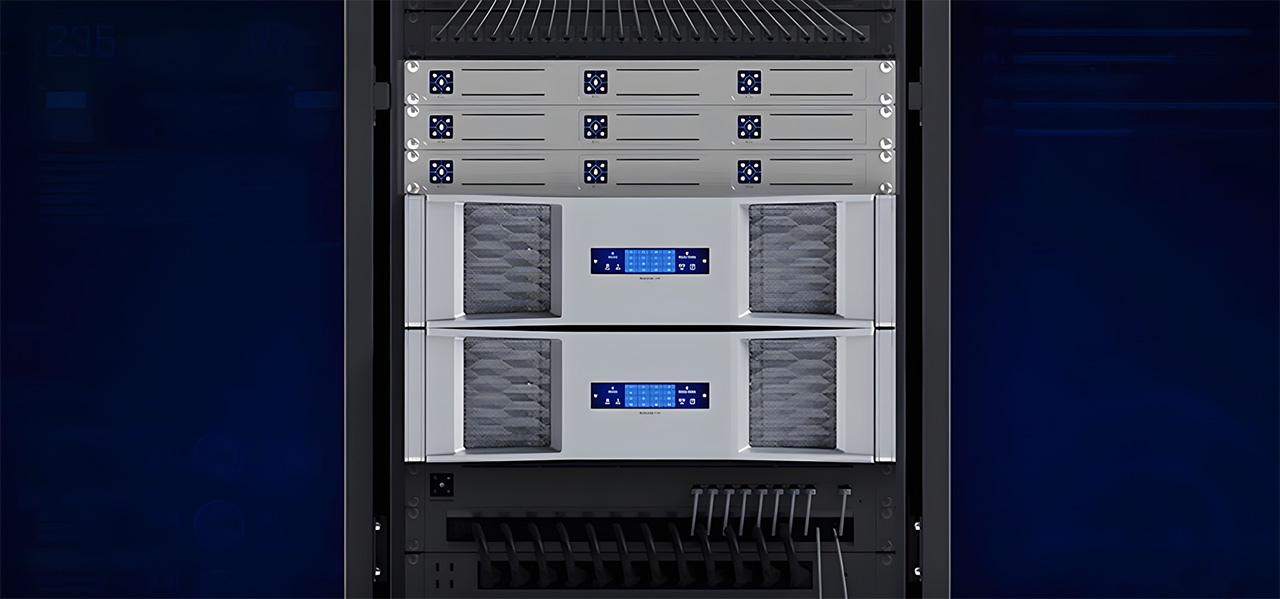
Instead of over-engineering the setup by installing multiple expensive control panels, we engineered an advanced workaround. We connected two intercoms, two surveillance cameras, and both heavy-duty automated gates into a single UniFi Gate Hub panel.
Project Scope: Dual Gate Control Setup
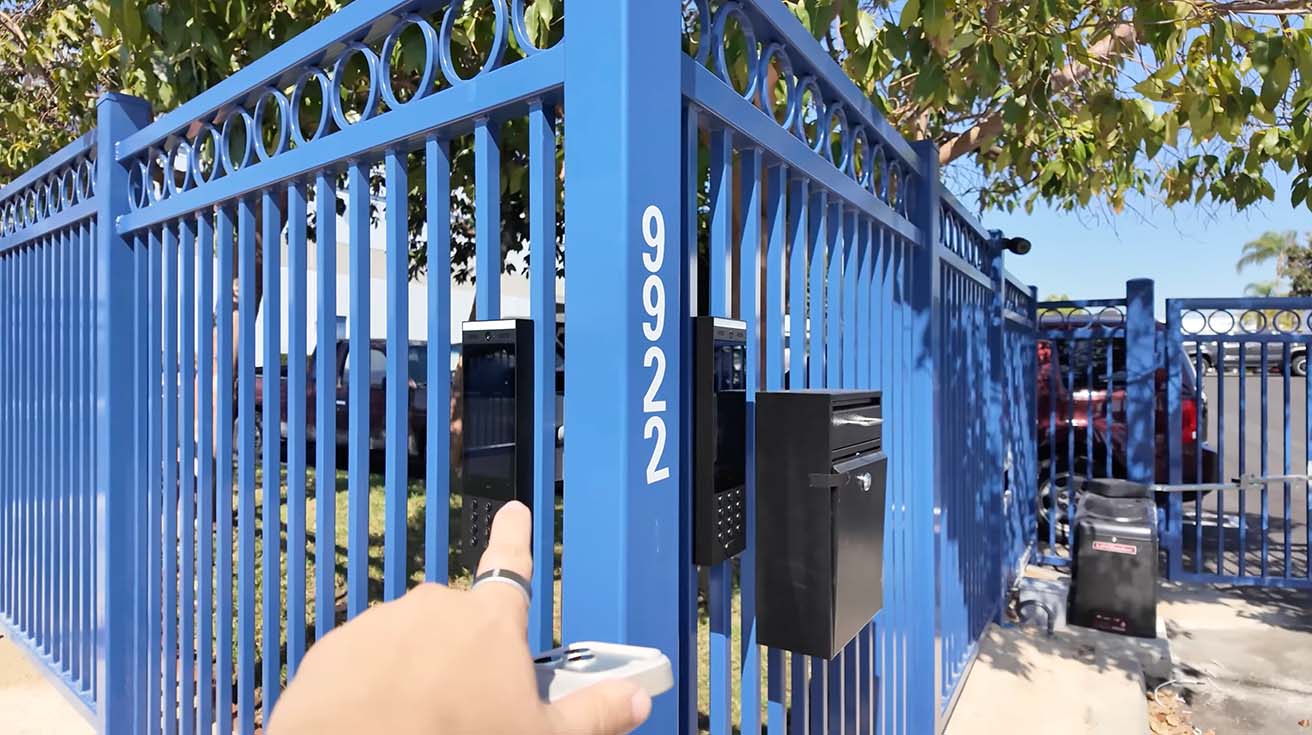
The deployment goal was clear: create a fully integrated entry experience for both employee vehicles and incoming commercial deliveries. For this layout, we deployed two UniFi Intercom units (UA-G3-Intercom) and two UniFi G6 Bullet cameras (UVC-G6-Bullet) to monitor the perimeters.
Normally, an installer might default to purchasing a separate control console for each point of entry, similar to a standard Ubiquiti Access Control Installation for the Office. However, by mapping out the terminal architecture of the UniFi Gate Hub, we engineered a solution to run both gates off a single panel, drastically cutting down on hardware footprint and system complexity.
The Workaround: Connecting a Dry Contact Gate to a 12V Terminal
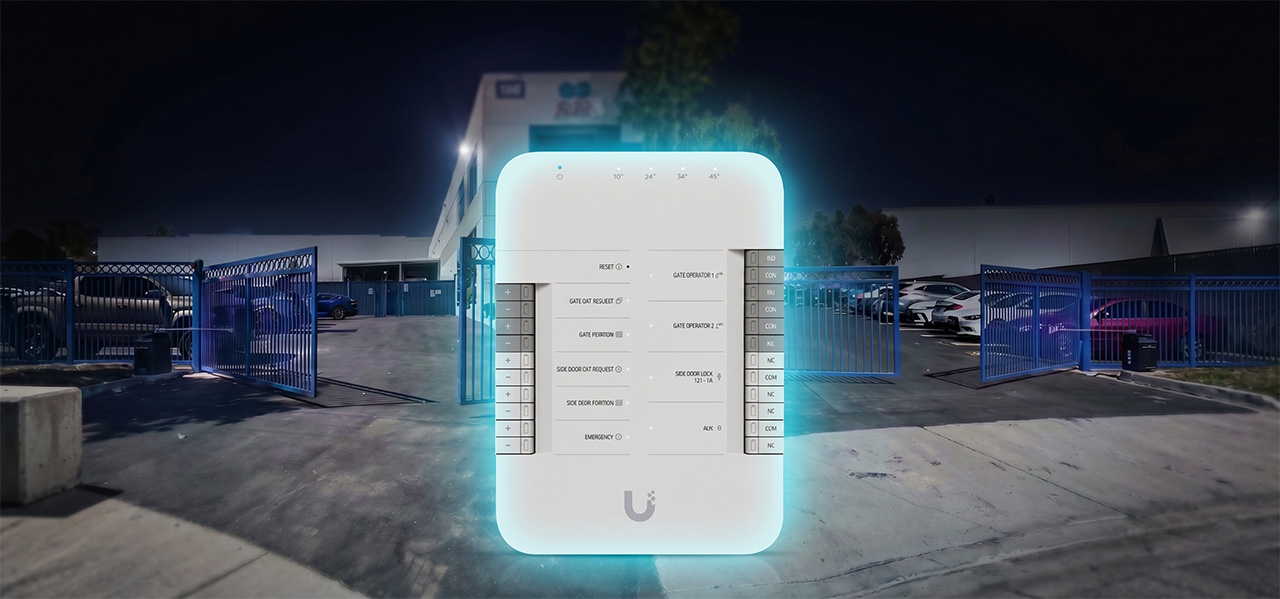
The UniFi Gate Hub is natively designed to manage a single main gate using a dry contact relay, alongside a secondary pedestrian door using a 12-Volt powered lock terminal. The primary technical challenge is that commercial gate control boards cannot receive a powered voltage input. They require an isolated, unpowered dry contact loop to trigger the opening cycle.
If you connect the 12V side-door lock output directly to a gate control board, you risk shorting out the electronics. To safely bridge this gap, we implemented a hardware workaround. We used an external power relay to isolate the 12V output from the Gate Hub and convert it into a clean, unpowered dry contact signal. This approach is highly effective when controlling driveway gates with an integrated access system.
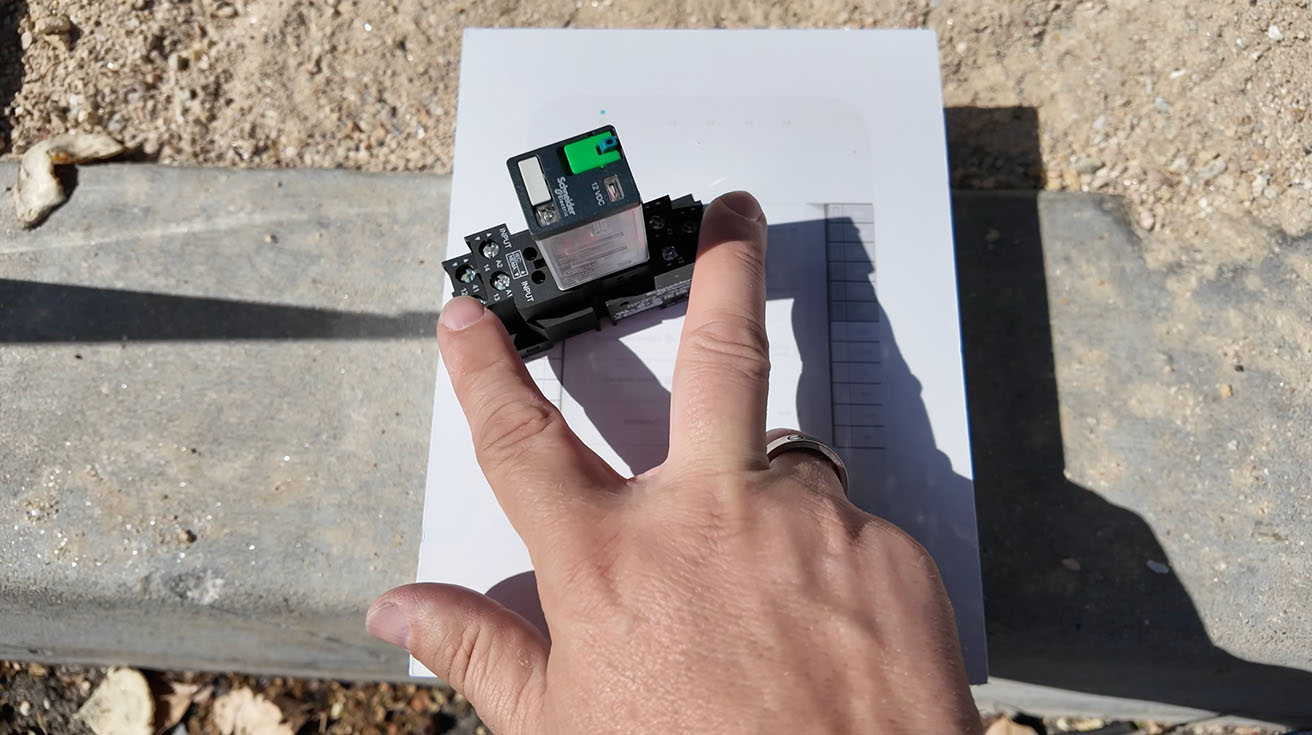
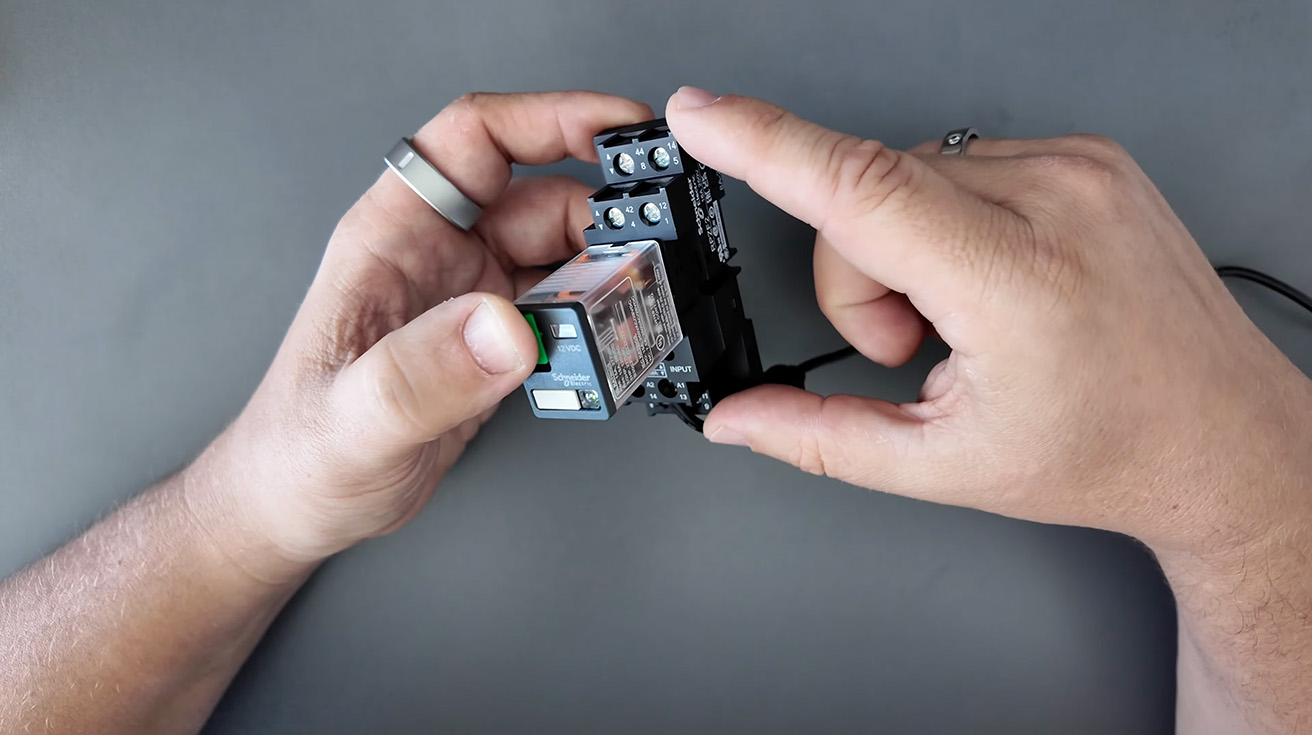
Hardware Breakdown: Schneider Relay & Plugin Socket
To execute this isolation workaround safely, we used industrial-grade components from Schneider Electric:
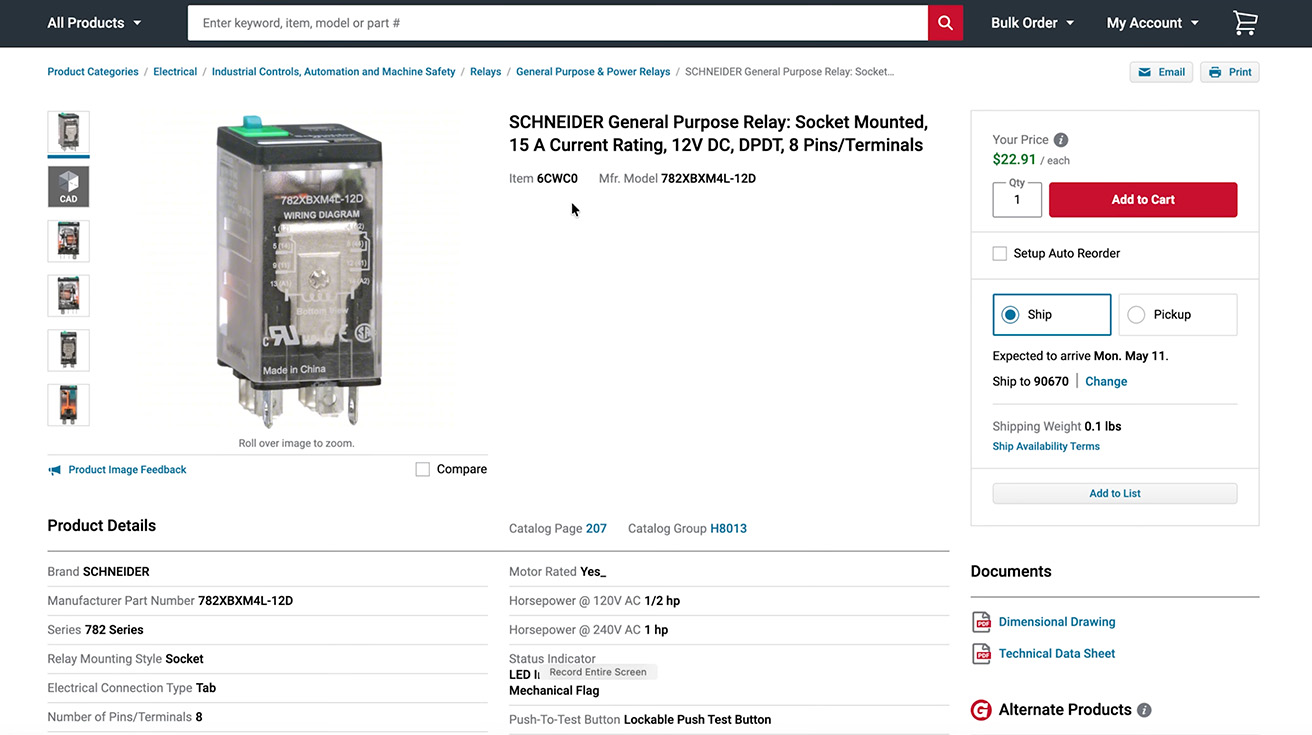
- Schneider Electric Power Relay (782XBXM4L-12D): A 12V DC Double Pole Double Throw (DPDT) general-purpose relay equipped with an LED indicator and a clear cover.
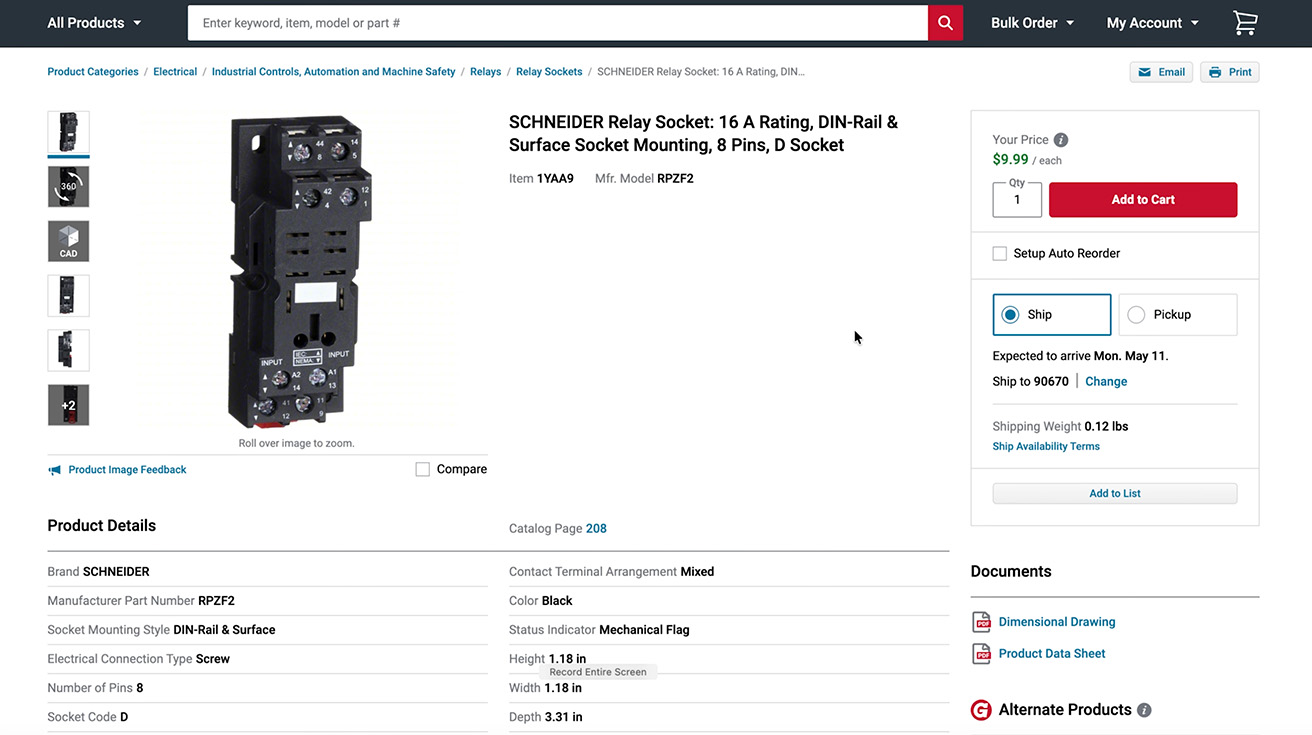
- Schneider Plugin Relay Socket (RPZF2): A specialized matching socket that allows for secure DIN-rail or surface mounting, breaking out internal relay pins into heavy-duty screw-clamp terminal blocks.
Using the dedicated plug-in socket is critical for field serviceability, allowing any technician to replace the relay module instantly without rewiring the terminal lines.
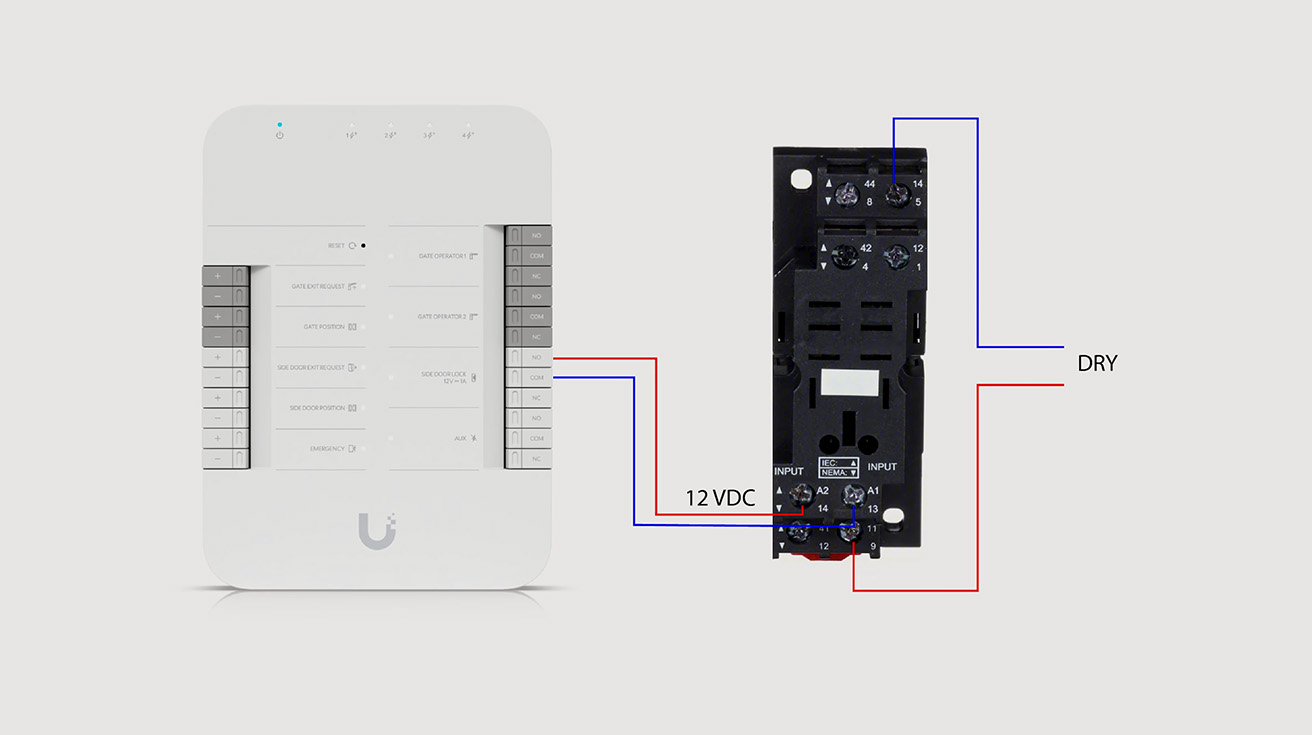
Wiring Guide: Connecting the Relay to the Gate Hub & Board
The wiring sequence requires precision to ensure proper relay coil activation:
- Input Signal Side: We ran lines from the Side Door Lock 12V DC terminal blocks on the UniFi Gate Hub directly to terminals A1 and A2 on the Schneider relay socket. This powers the internal electromagnetic coil.
- Output Contact Side: For the gate operator control board, we utilized the first isolated switch set on the socket, specifically terminal 9 (Common) and terminal 5 (Normally Open). Terminal 1 (Normally Closed) is left unused in this configuration.
When the UniFi platform triggers the side-door unlock sequence, the hub outputs 12V DC to the socket. This energizes the internal coil, instantly pulling the physical internal switch down to short the connection between pins 9 and 5, perfectly replicating a native dry contact closure. The opposite side of the socket contains a mirrored secondary switch set with terminal 12 as Common, terminal 4 as Normally Open, and terminal 8 as Normally Closed, which can be reserved for auxiliary systems.
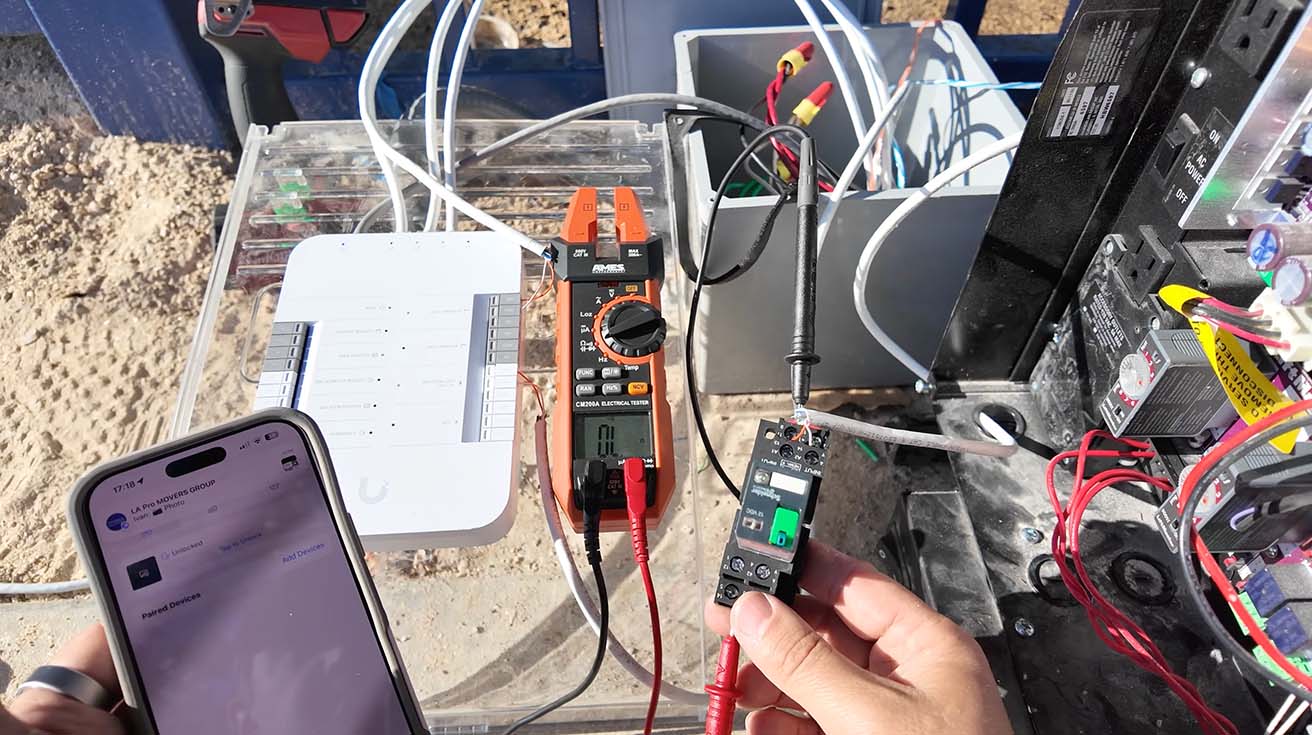
Testing the Relay Voltage & Dry Contact Behavior
Before making the final connections to the customer's gate automation machinery, we executed a comprehensive diagnostics phase using a digital multimeter. First, we verified the voltage behavior at the input stage.
When triggering the secondary gate via the software, the relay clicked cleanly, and the tester confirmed a stable 12V DC current arriving at the A1 and A2 terminals. Second, we switched the multimeter to continuity mode and attached the leads to terminals 9 and 5. The relay engaged perfectly, showing a zero-ohm closed loop with no voltage leakage, proving the workaround safe for field deployment.
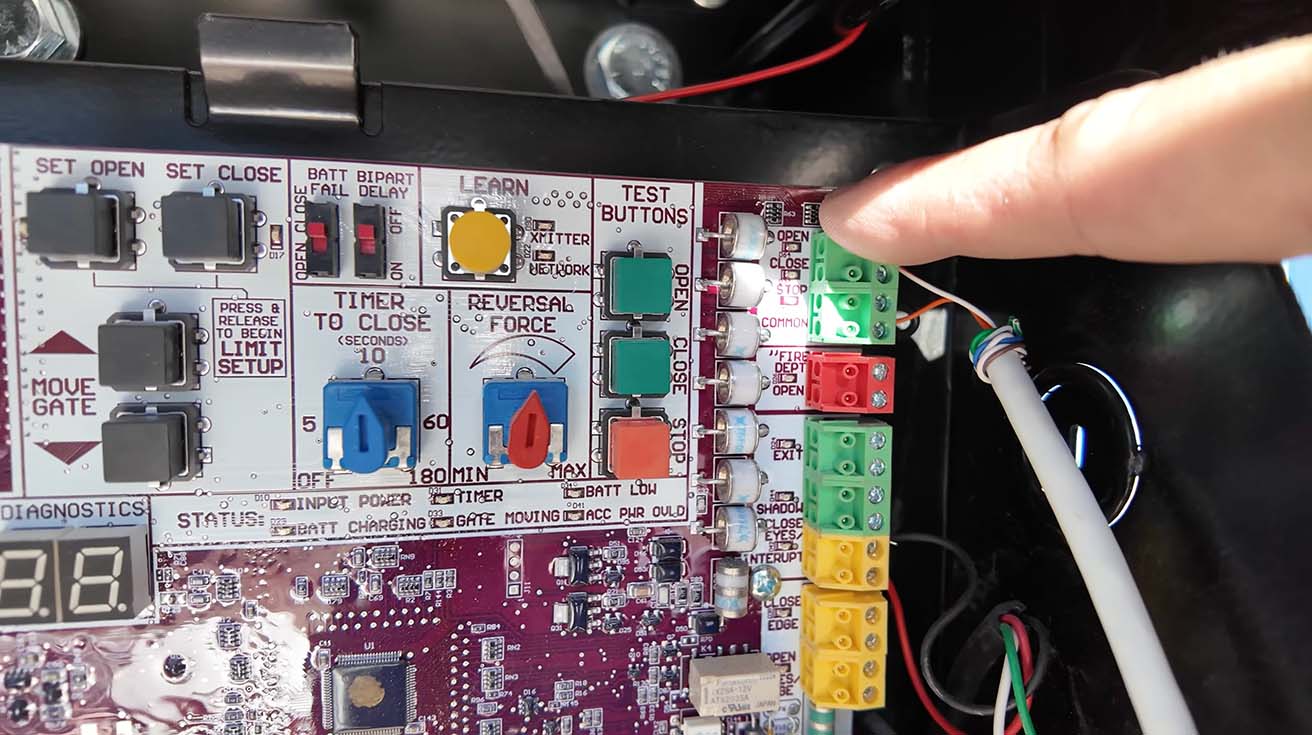
Gate Control Board Wiring
With the dry contact functionality verified, the terminal connections on the main gate machinery were straightforward. We ran a 2-conductor low-voltage wire from terminals 9 and 5 of our Schneider socket directly into the Common and Open input terminals on the gate operator's control board, such as a LiftMaster wireless access terminal loop.
Because commercial gates are engineered to close automatically via integrated vehicle loops or a safety countdown timer, our relay only needs to pulse the closed connection for a brief second to initiate the opening cycle safely.
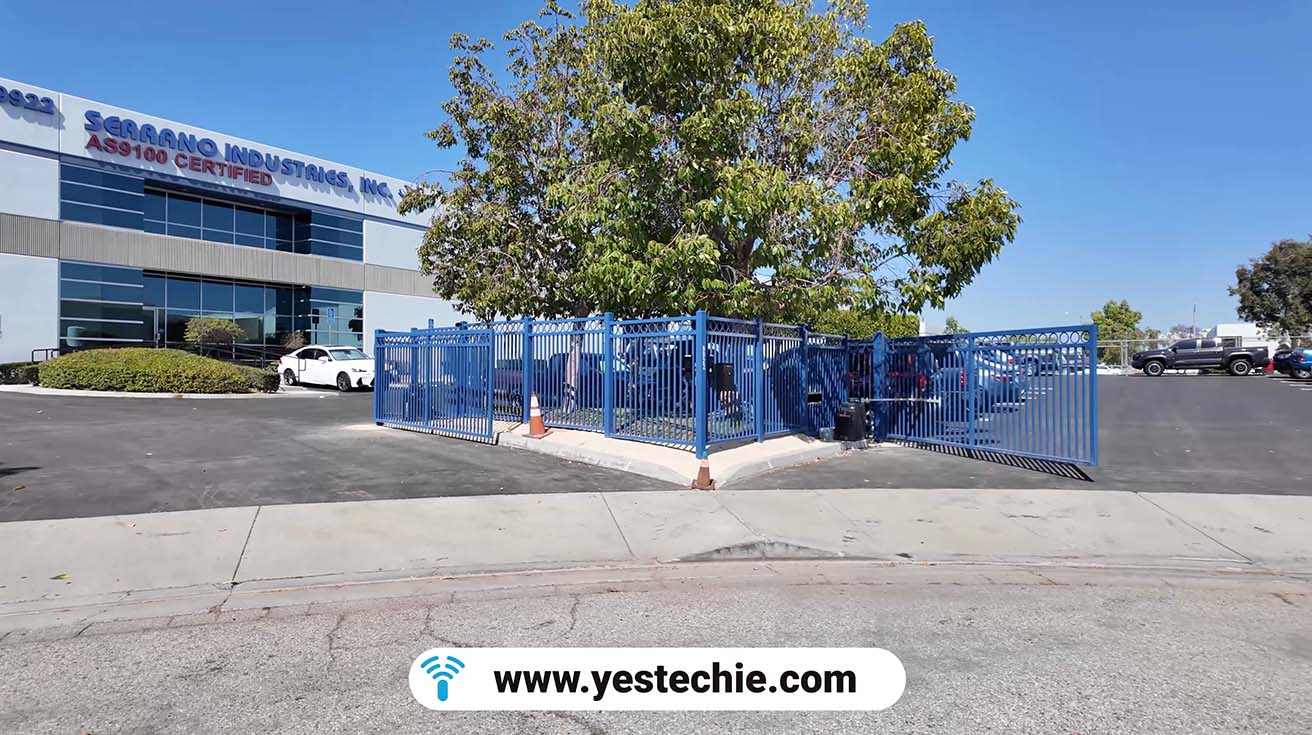
Live Demo: Controlling Both Gates via UniFi Access
Following the final clean-up of the wiring enclosures, the system went live. Both UniFi Intercom stations and G6 Bullet cameras integrated seamlessly into the centralized dashboard. This clean approach matches the standard expected of an installation of the UniFi Intercom system at double-door gates.
During the live testing phase, we triggered both entry points simultaneously from the application. The employee parking gate opened instantly via the native dry contact relay, while the delivery gate engaged immediately through our custom relay loop. One hub, two independent automated gates, complete visibility, and zero wasted hardware.
Conclusion: Streamlined Enterprise Access
By leveraging a thirty-dollar industrial relay solution, we eliminated the need to purchase, mount, and license a second full UniFi controller panel. This project highlights the importance of working with integrators who understand electrical schematics as deeply as network architecture.
If you are looking to deploy a robust, cost-effective physical security network for your business, look into our full range of commercial security services or contact our specialist commercial door access control technicians to design your custom layout.
Check out the video from this deployment:
FAQ: Advanced UniFi Access Integration
Can a single UniFi Gate Hub control two separate vehicle gates?
Natively, the panel is built to control one dry-contact gate and one 12V pedestrian door strike. However, by adding an external isolation relay to the 12V lock output loop, you can safely convert that voltage into a secondary dry contact signal, allowing a single hub to manage two independent motorized vehicle gates.
Why can't I connect the Gate Hub's 12V output directly to a gate operator?
Commercial gate operator boards are engineered to receive an unpowered, isolated dry contact trigger loop. Introducing a live 12-Volt current directly into these input terminal blocks will likely cause electrical damage or short circuit the gate's main control board.
What are the advantages of using the Schneider 782XBXM4L-12D relay socket?
Using a matching plugin socket like the Schneider RPZF2 breaks out the relay pins into secure screw terminals, making field installation clean. It allows for effortless maintenance, as a damaged relay can be popped out and replaced instantly without disconnecting any field wiring lines.
How do the cameras and intercoms behave in this dual-gate configuration?
Both UniFi Intercom units and G6 Bullet cameras plug directly into your PoE switch and associate logically with their respective gates inside the management dashboard. When an employee or delivery driver requests entry at either point, the correct camera feed and trigger button appear instantly on your screen.
Does this relay workaround affect the automatic closing safety loop of the gate?
No. The custom relay configuration only acts as an intentional trigger to open the gate, mimicking a standard exit loop or physical key switch button. The automated safety closing sequence remains fully managed by the gate operator board's internal safety loops and timing mechanisms.