Complete Office Network Installation Guide: From Initial Assessment to Future Scalability
Welcome to our guide on network installation and planning. In today's digital world, having a strong and efficient network is vital for any business or organization. This guide is designed to walk you through the crucial steps of setting up a network, from assessing your installation site to maintaining your system after setup. Even if you plan to entrust the entire project to professionals, understanding the entire process will be beneficial.
It will help you properly formulate the technical requirements for your future network and communicate effectively with specialists from a cable installation company. Whether you're a small business owner, an IT professional, or just someone keen to grasp the intricacies of network installation, this guide offers essential insights and practical advice. Let's embark on this journey to ensure that your network is not only operational but also future-proof and scalable to meet the evolving needs of your business.
1. Assessing the Installation Site for Network Setup
Understanding the Physical Space for Optimal Cable Routing:
For successful network installation and planning, it's crucial to have a thorough understanding of your building's construction. This knowledge assists in determining the most efficient routes for laying cables, the necessary additional equipment, and the right type of cables for the environment. Consider factors like wall material, ceiling access, and floor layouts to optimize cable routes, minimize disruption, and maximize network efficiency.
Identifying Environmental Challenges in Network Planning:
Be mindful of unique challenges posed by the site, such as multi-level floors or stationary equipment, which could impact the network installation process.
Selecting the Ideal Location for Your Network Hub:
Identifying one or more potential locations for the network hub is a key step. Place the hub strategically in a secure, less accessible area, particularly important if handling sensitive data. Essential network components like servers, routers, and firewalls should be here. Ensure this space provides not only security but also adequate ventilation and power supply for the efficiency and longevity of network hardware. Consider the limitations of Ethernet cables, like CAT 6, in terms of length for maintaining signal quality and network reliability. The hub should be centrally located to prevent exceeding these limits.
2. Defining Your Network Installation Needs
Clarifying Objectives for Network Setup:
Having a clear understanding of what you expect from your network is crucial for effectively communicating your needs to the network installation company.
Essential Questions for Effective Network Planning:
- What data speeds are necessary for your operations?
- Which cable types are best suited for your equipment, software, and applications?
- What is your budget for the network installation?
- How many devices will be connected to the network?
- Is there room for flexibility in equipment placement for an optimal network setup?
- Do you have plans for future network expansion?
- Where will key devices like computers, printers, and others be situated?
Engaging Stakeholders in the Network Design Process:
Include employees and IT personnel in this stage for valuable insights based on their experience with your current network infrastructure.

3. Designing the Network for Efficiency and Scalability
Creating a Detailed Network Layout Aligned with Physical Space:
Develop a network blueprint that aligns with the physical space and your defined needs. This should detail the placement of cables, network hubs, and devices for an efficient setup.
Choosing the Right Technology for Your Network:
Select routers and switches that meet your requirements for speed and bandwidth.
Ensuring Compatibility with Existing Systems:
Make sure the new network design is compatible with any existing infrastructure to minimize disruption and leverage current resources.
Future-Proofing Your Network Infrastructure:
Plan for the future by incorporating elements like extra space for additional cables, high-capacity lines such as fiber optics, and spare ports on equipment for easy expansion.
4. Selecting the Right Hardware for Network Installation
Quantifying Cabling and Hardware Needs:
Determine the length of cabling required as it dictates the amount of associated hardware needed. Strategically place network equipment considering the maximum permissible cable length and the number of ports required for device connections. This ensures efficient resource use and maintains network integrity.
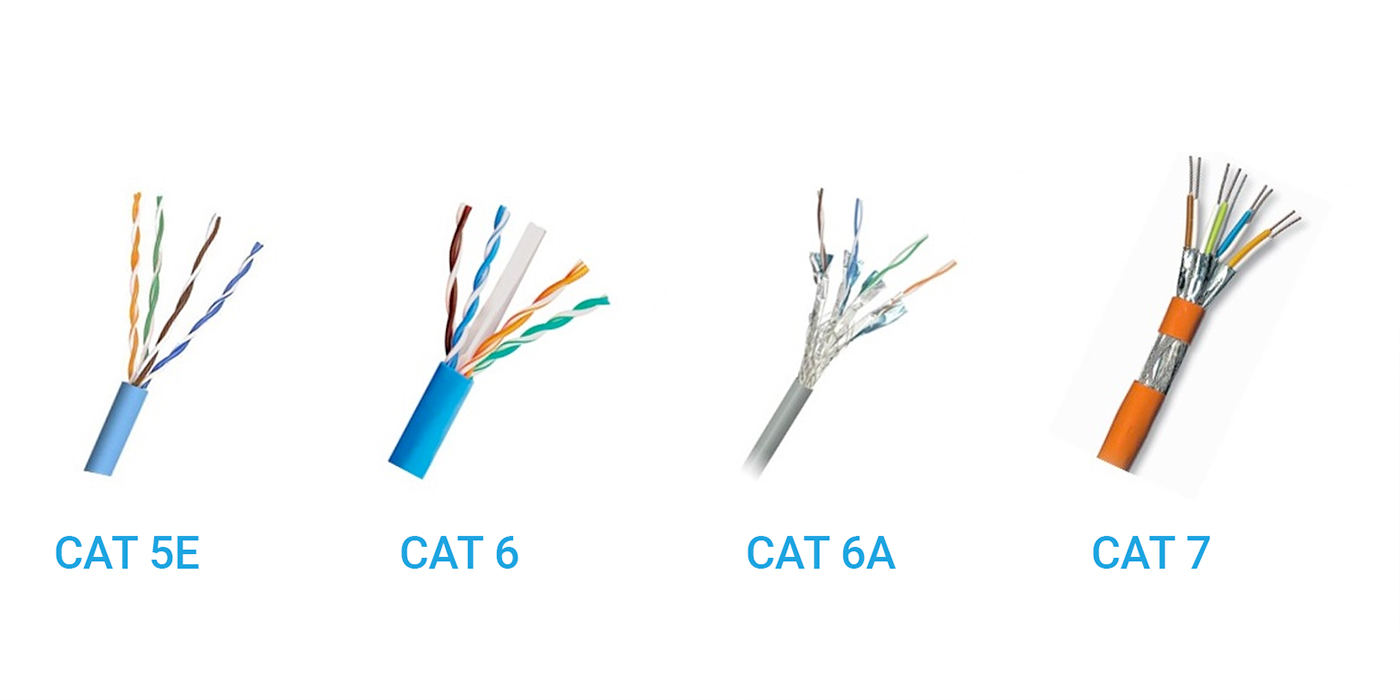
Choosing the Best Cabling for High-speed Data Transmission:
Base your cabling choice on technical specifications rather than cost alone. While Cat5e is economical, it often falls short for business needs. Cat6 and Cat7 are preferable for high-speed data, but Cat6 may be less effective over longer distances. Fiber optic cables offer the highest speeds and bandwidth, though they might exceed some project requirements.
5. Configuring and Setting Up Your Network System
Evaluating Installation Options:
Decide between self-installation or seeking a professional quote. Avoid over-the-phone estimates; each installation is unique and requires an on-site evaluation for accurate costing. Customers located in Los Angeles and neighboring counties can request an on-site evaluation on the Network Setup Service page. It's completely free.
Installing Cabling and Network Equipment:
If opting for self-installation, adhere closely to the network design for precise cable and hardware installation. Ensure proper routing and secure connections. For professional cable installation, work with the team to align their efforts with your network plan.
Configuring the Network for Optimal Performance:
Set up the network, segmenting it for different user groups such as employees, guests, and IoT devices. Implement robust cybersecurity measures for network protection.
6. Ensuring Effective Device Communication on the Network
Finalizing Network Connections:
Verify that all devices, including computers, printers, security cameras, WiFi access points, VoIP phones, and other network-enabled devices, are properly connected to the network.
Conducting Network Testing and Validation:
Perform thorough testing to confirm effective communication across all devices. Check for data transfer speeds, reliability, and potential bottlenecks in the network.
Network Troubleshooting:
Resolve any connectivity issues identified during testing, adjusting configurations as necessary to enhance network performance.
7. Implementing Ongoing Network Maintenance Practices
Scheduling Regular Network Evaluations:
Plan periodic assessments to ensure the network stays efficient, secure, and up-to-date with technological advancements.
Updating Network Systems and Software:
Maintain security and performance by regularly updating network software and hardware.
Proactive Network Monitoring and Troubleshooting:
Keep an eye on the network for emerging issues and address them proactively to prevent downtime and maintain optimal performance.
In conclusion, network installation and maintenance is a process that requires attention to detail, strategic planning, and proactive management. By following the steps in this guide, you've built a strong foundation for a reliable and efficient network. The key to a successful network setup is understanding your specific needs, choosing the right equipment, and staying vigilant with regular maintenance and updates.
As technology advances, your network should also evolve, meeting new challenges and opportunities. We hope this guide has been a helpful resource in your network installation journey and encourages you to keep learning and applying best practices to maintain a top-performing network.