Ubiquiti UniFi Identity Endpoint - Google SSO Integration
Ubiquiti UniFi Identity Endpoint - Google SSO Integration
In this guide, we’ll take you step-by-step through setting up the UniFi Identity Endpoint on the UniFi Dream Machine Pro (UDM-Pro) and integrating it with Google Workspace. This setup streamlines user onboarding and management, making it a breeze to control user access to your UniFi infrastructure - network (VPN & Wi-Fi), door access, cameras, phones, charging stations, and more.
Note: This guide is based on official Ubiquiti documentation and Google Workspace help articles. For the latest details or firmware-specific updates, check out the official sources from Ubiquiti Help Center and Google Workspace Support.
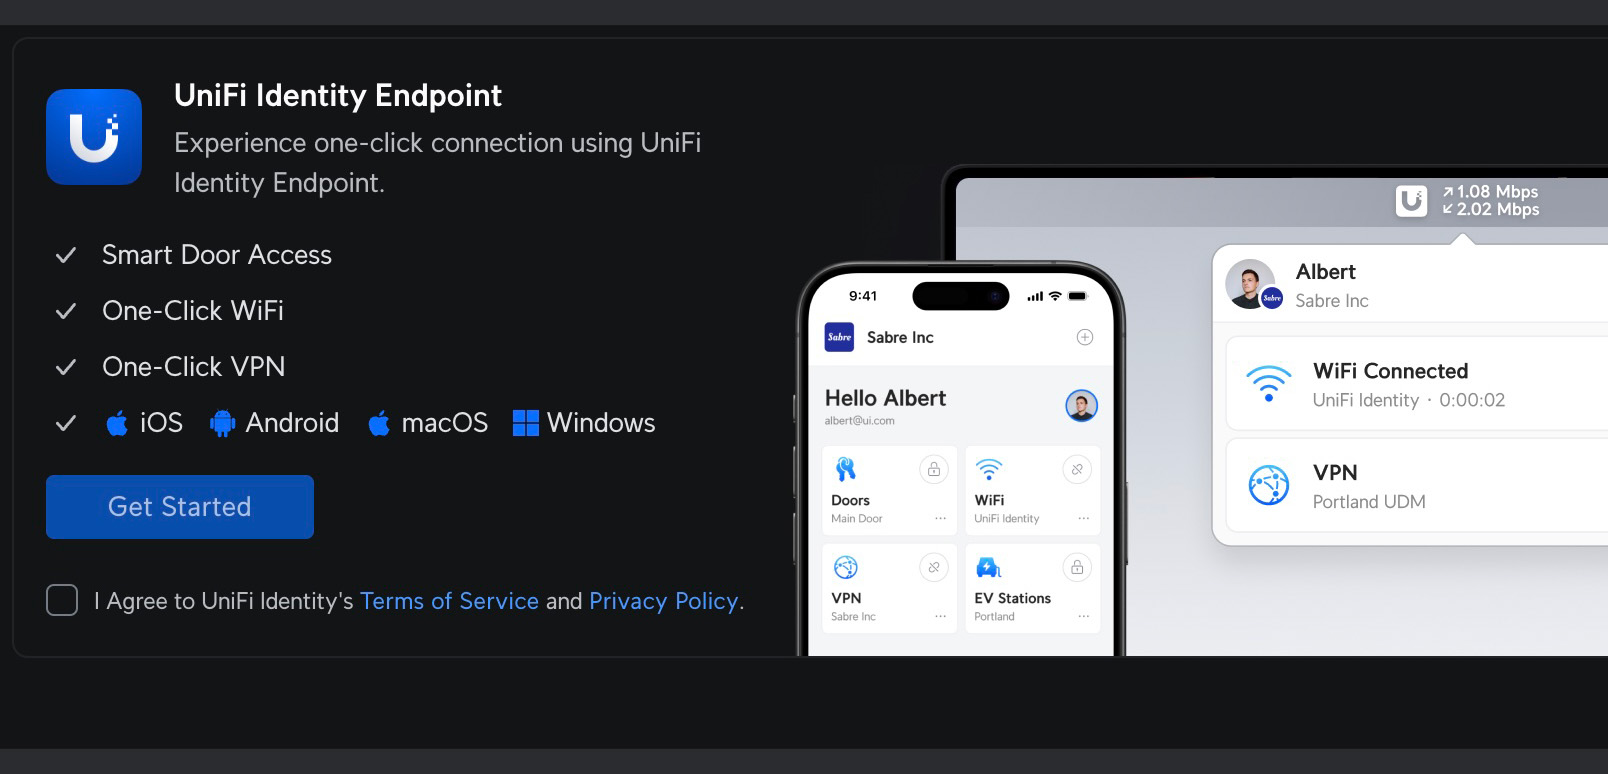
The UniFi Identity Endpoint is a free, revolutionary feature in the Ubiquiti ecosystem that transforms user provisioning into a seamless, one-click process. Users can instantly access a secure hub of essential services, making it a true game-changer for both admins and end-users. Pretty neat, right?
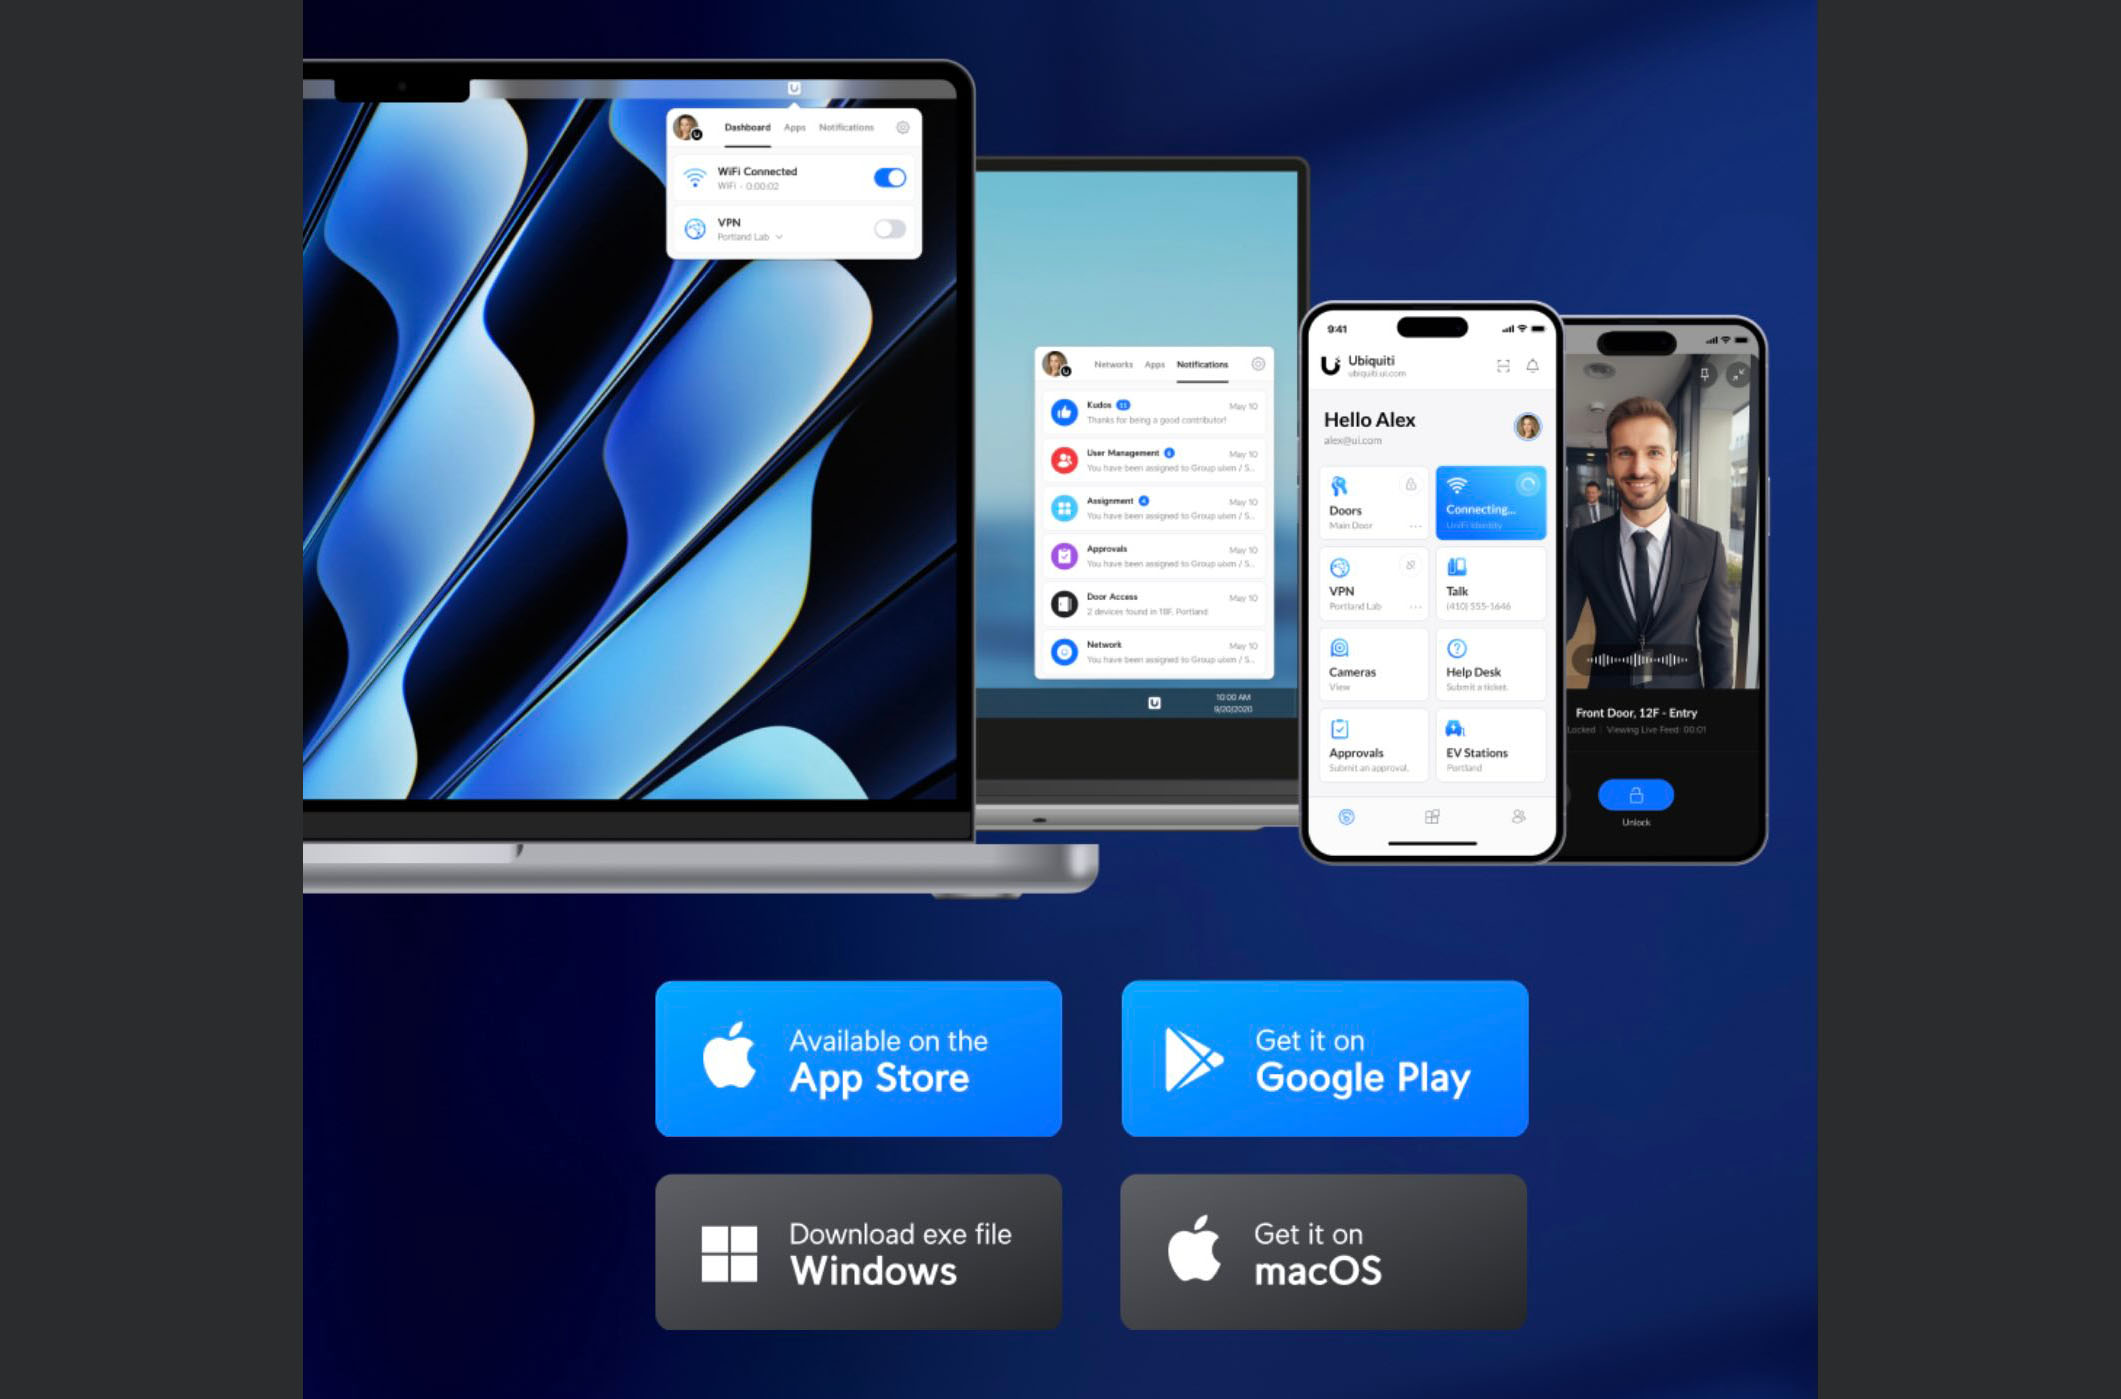
Available on macOS, Windows, Linux, iOS, and Android, UniFi Identity delivers a smooth, unified experience across all platforms. It’s a lifesaver for employees onboarding and ongoing management, especially for organizations with 50+ employees, cutting IT overhead and speeding up adoption.
Integrating Google Workspace with UniFi Identity
If your organization already relies on identity solutions like Google Workspace, Microsoft Entra AD, or local Active Directory, you’re in luck. This guide zeros in on syncing your Google Organization Directory with UniFi Access for a seamless experience.
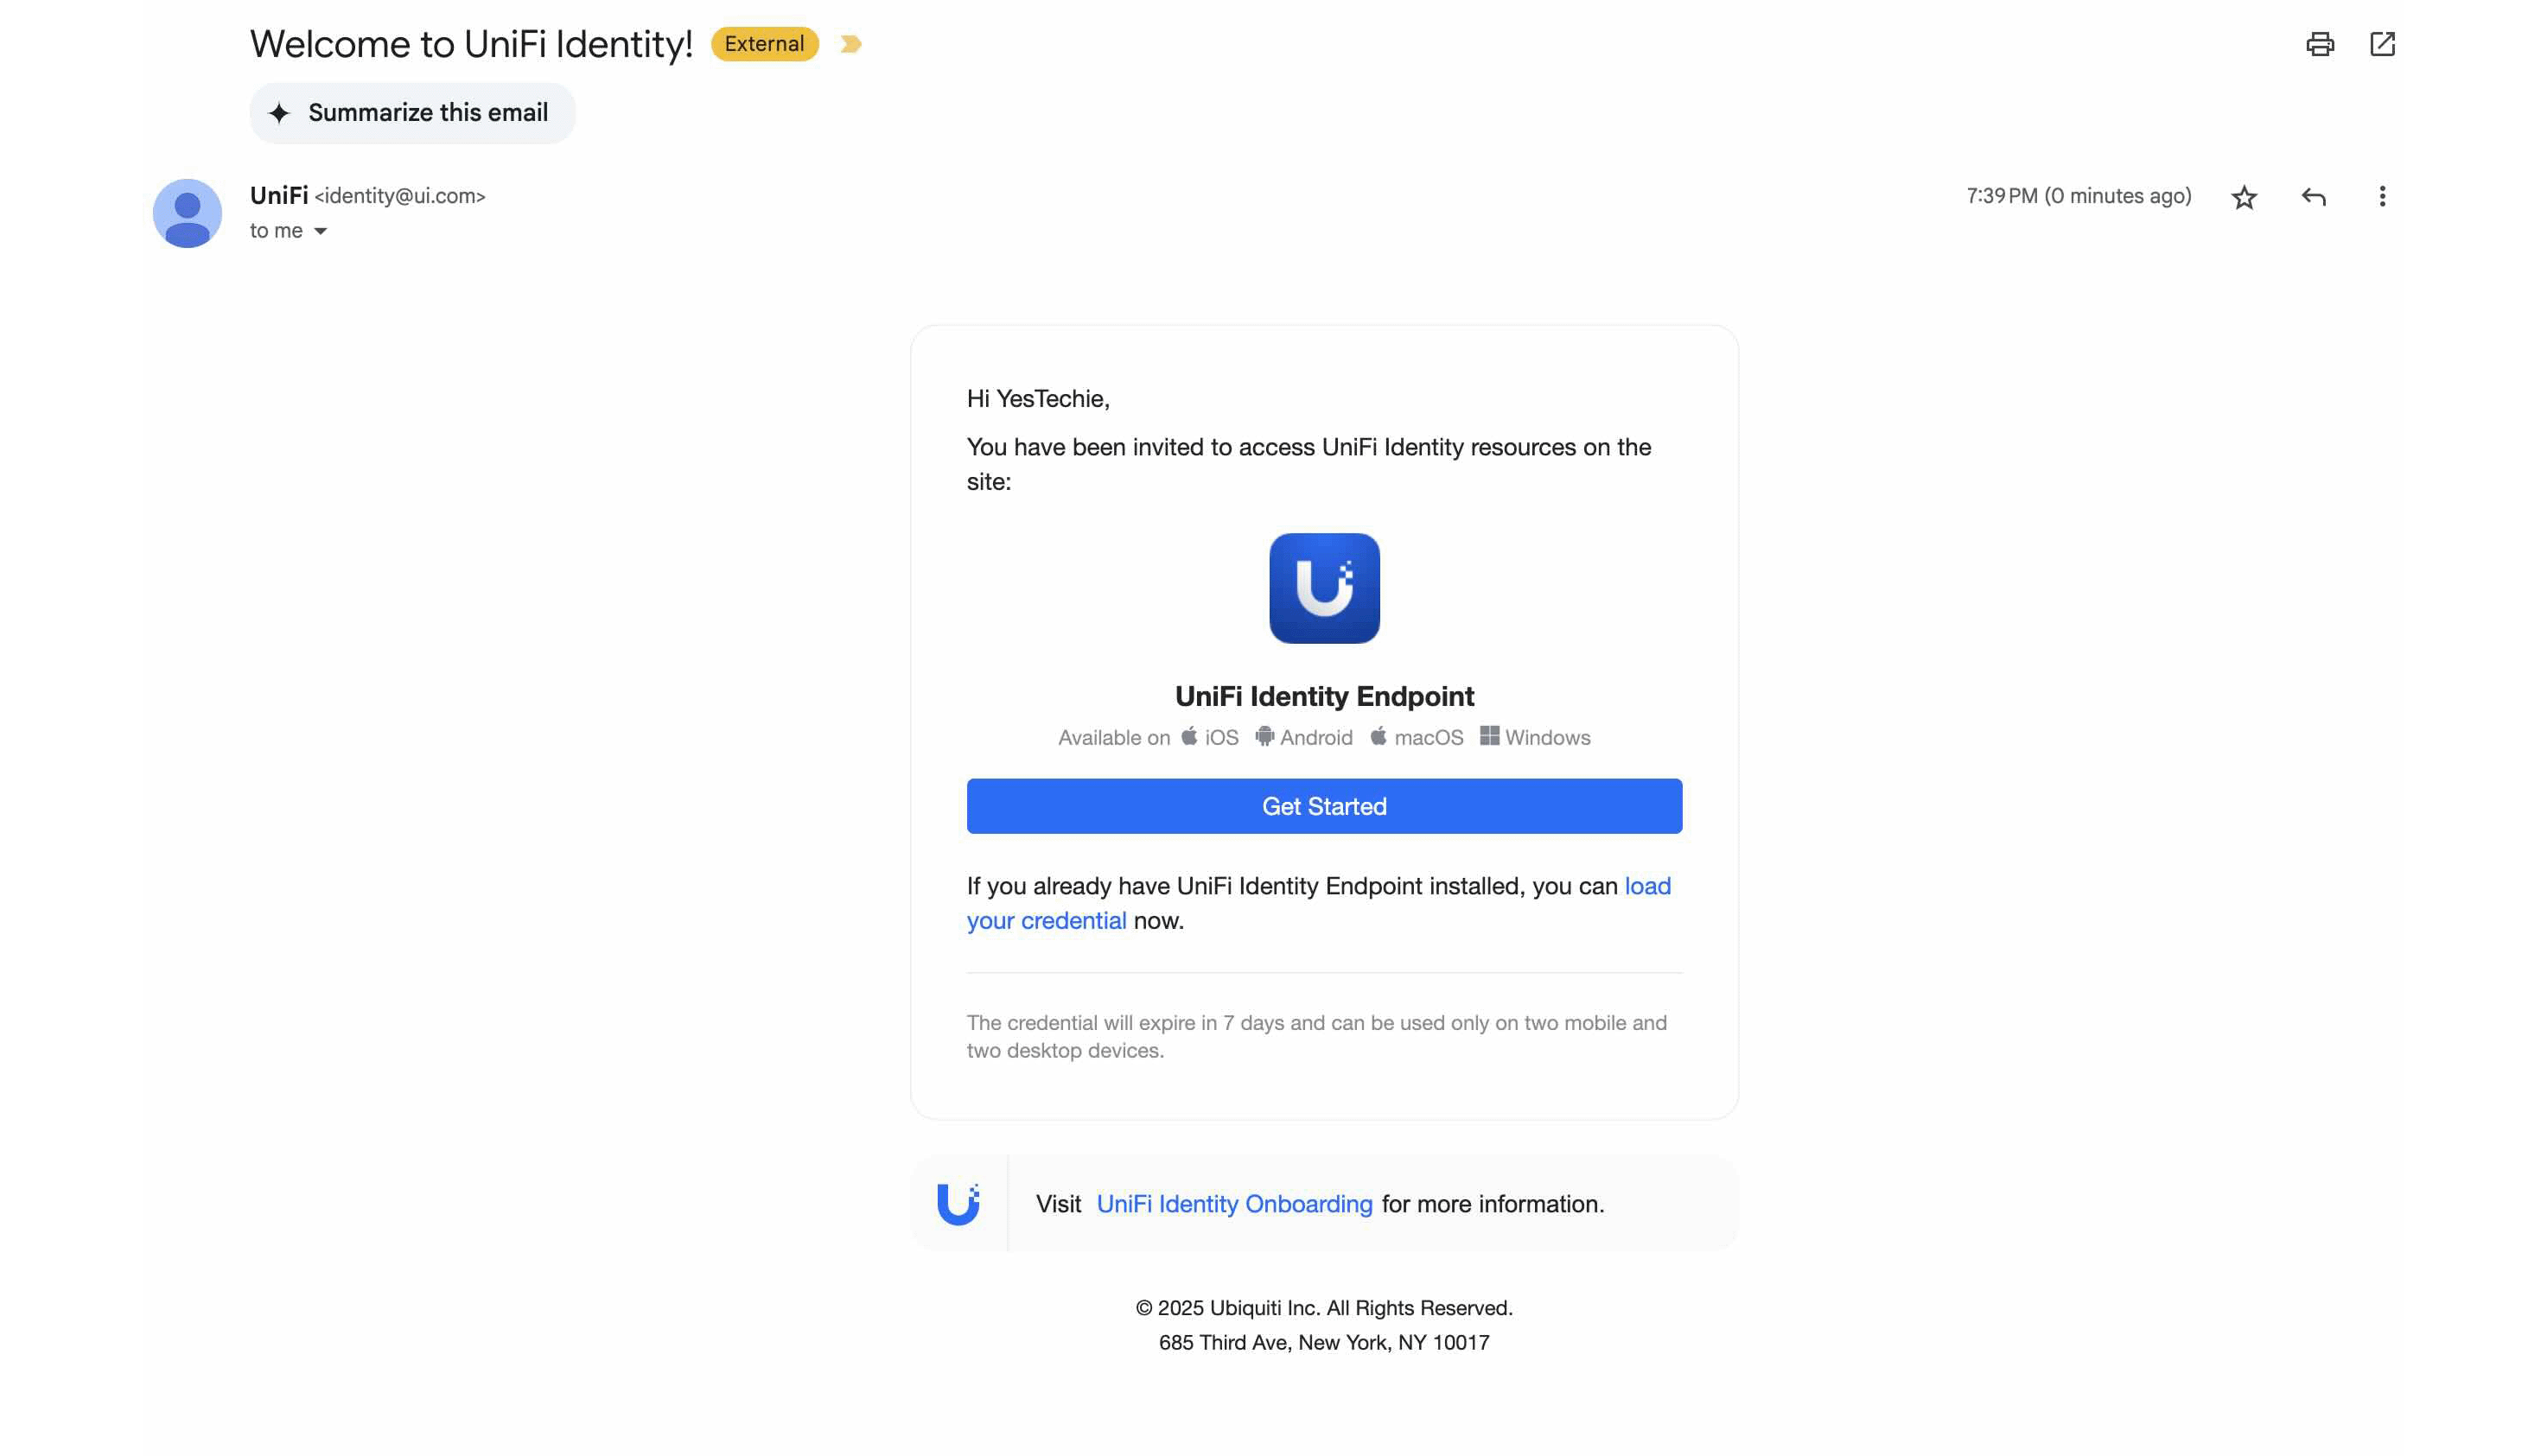
Once integrated, your users will get automated onboarding emails with instructions to download the UniFi Identity app on their devices. They’ll log in with their Google Workspace credentials and instantly unlock access to doors controlled by UniFi Access—no extra hassle required.
Step-by-Step Integration Guide
Let’s dive into the setup using the UniFi web interface:
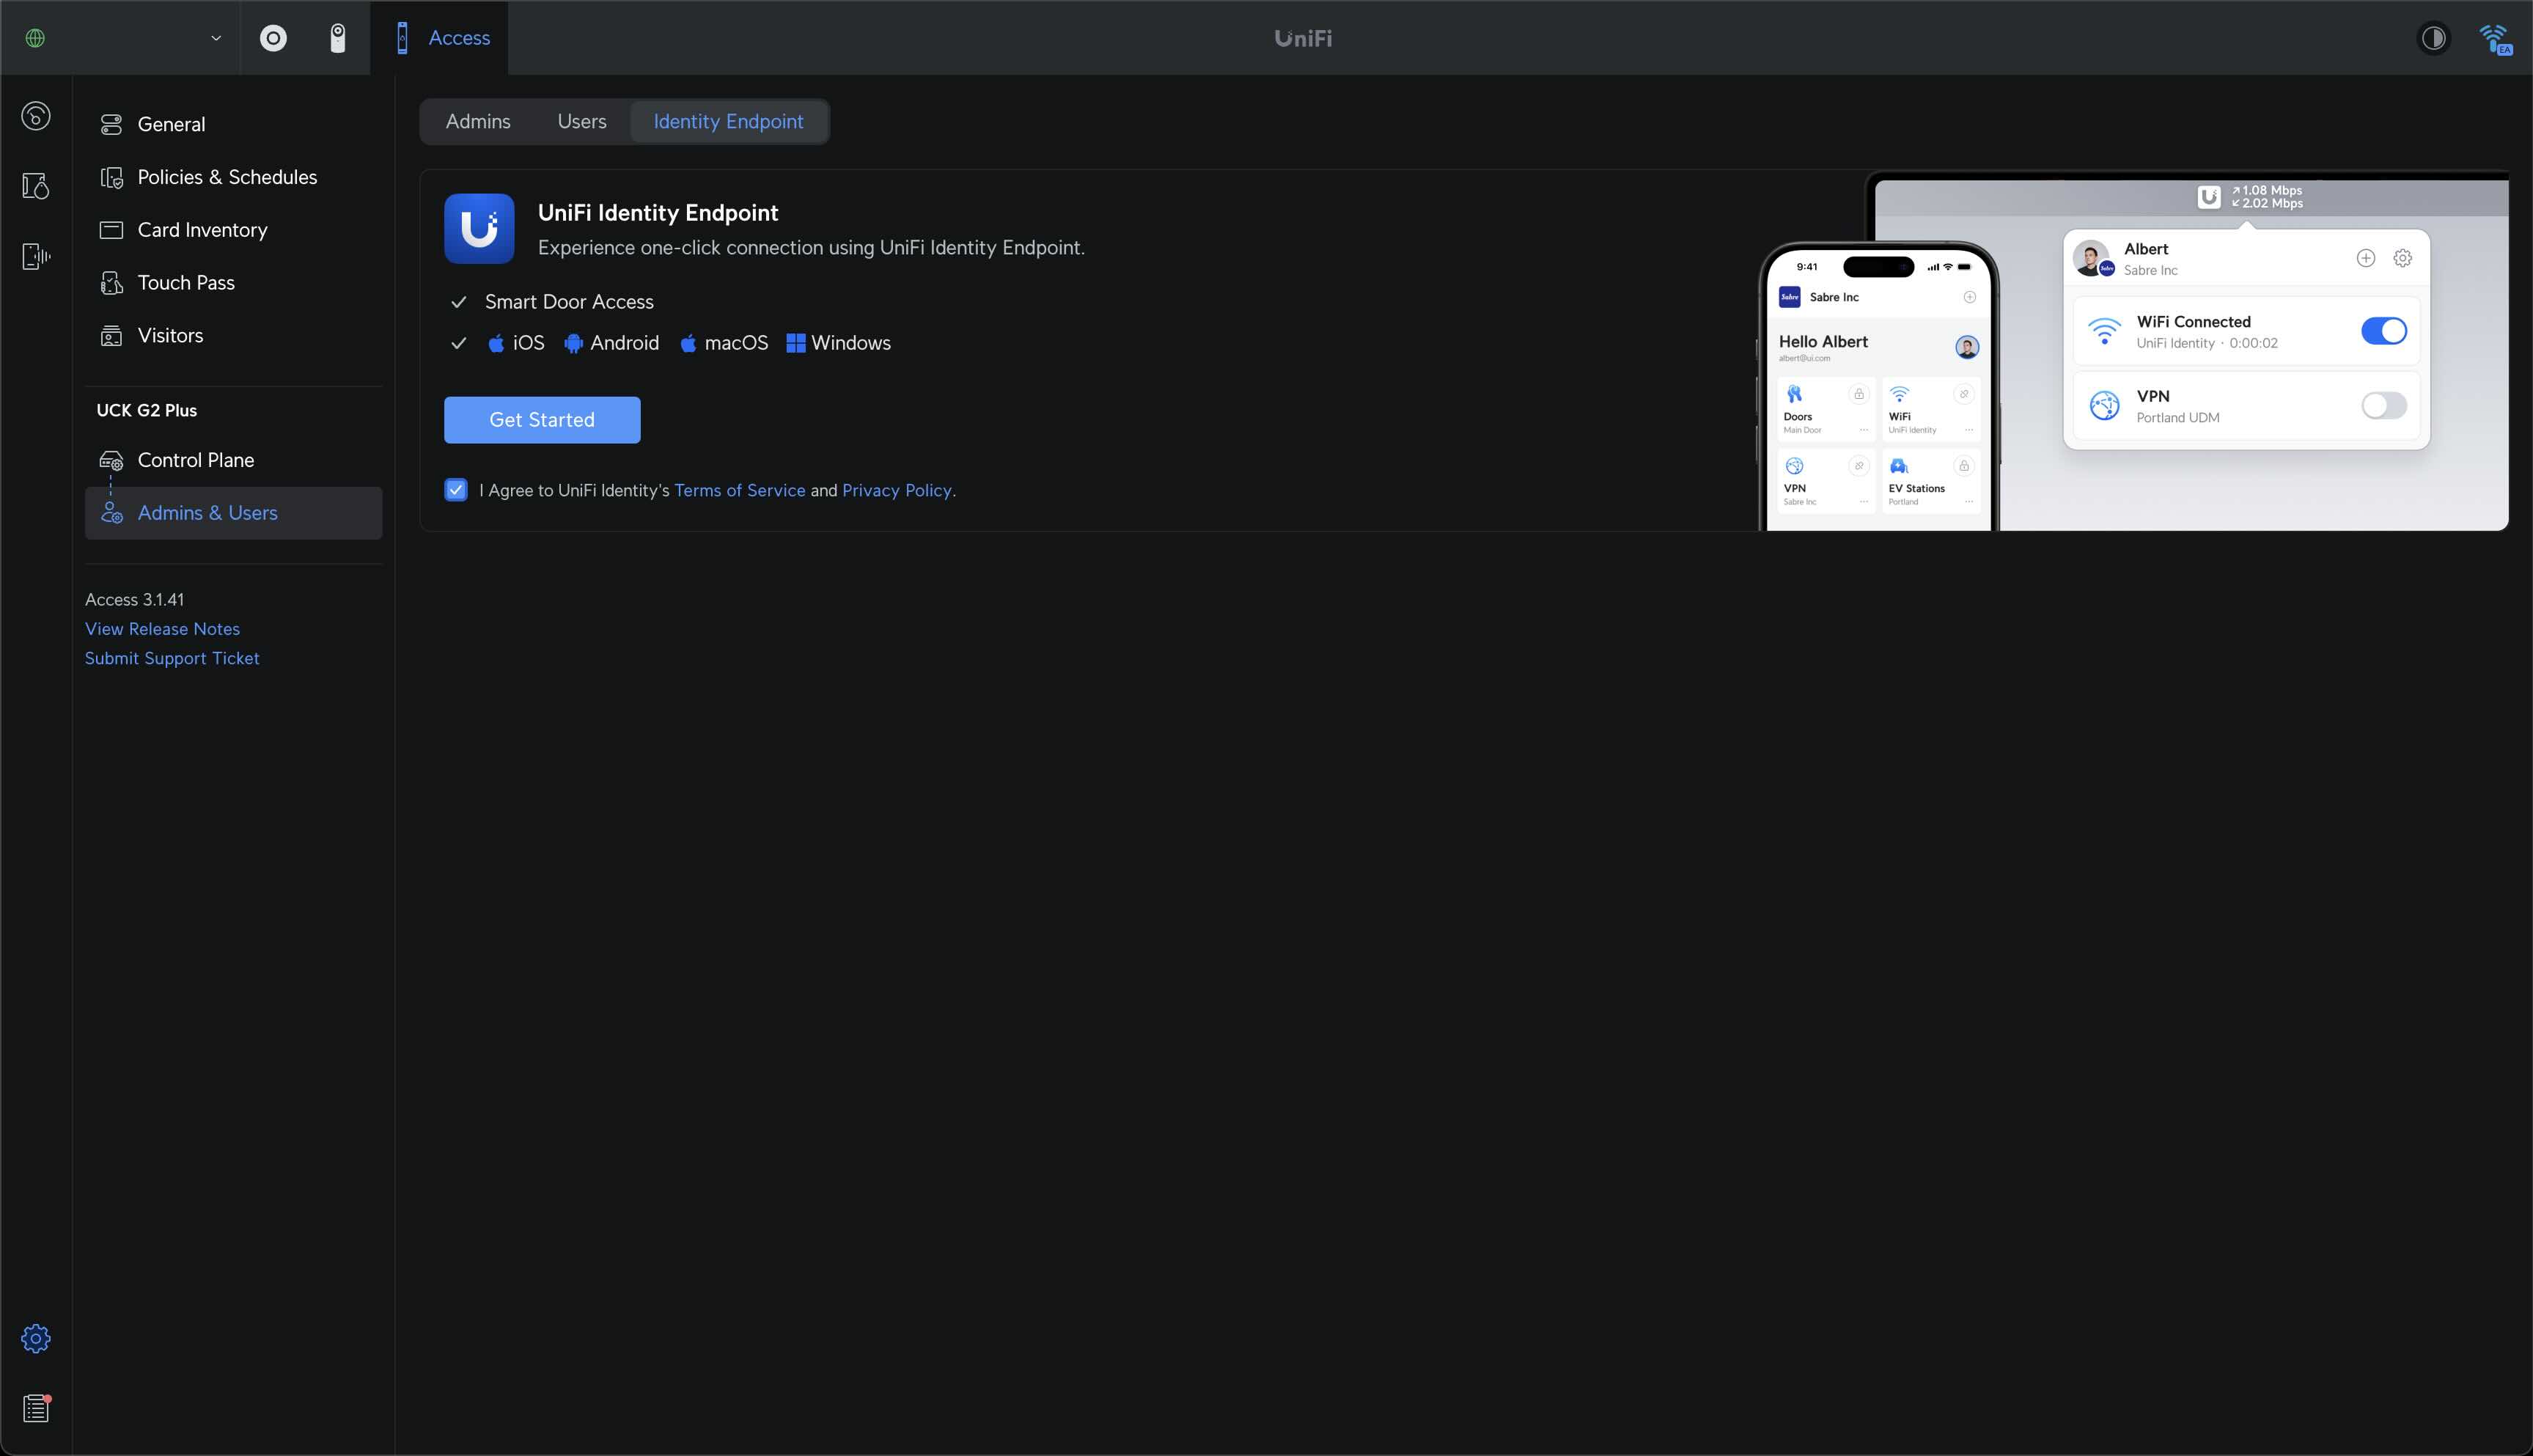
- Log into your UniFi Access web interface.
- Head to Settings (gear icon).
- Click Admins & Users.
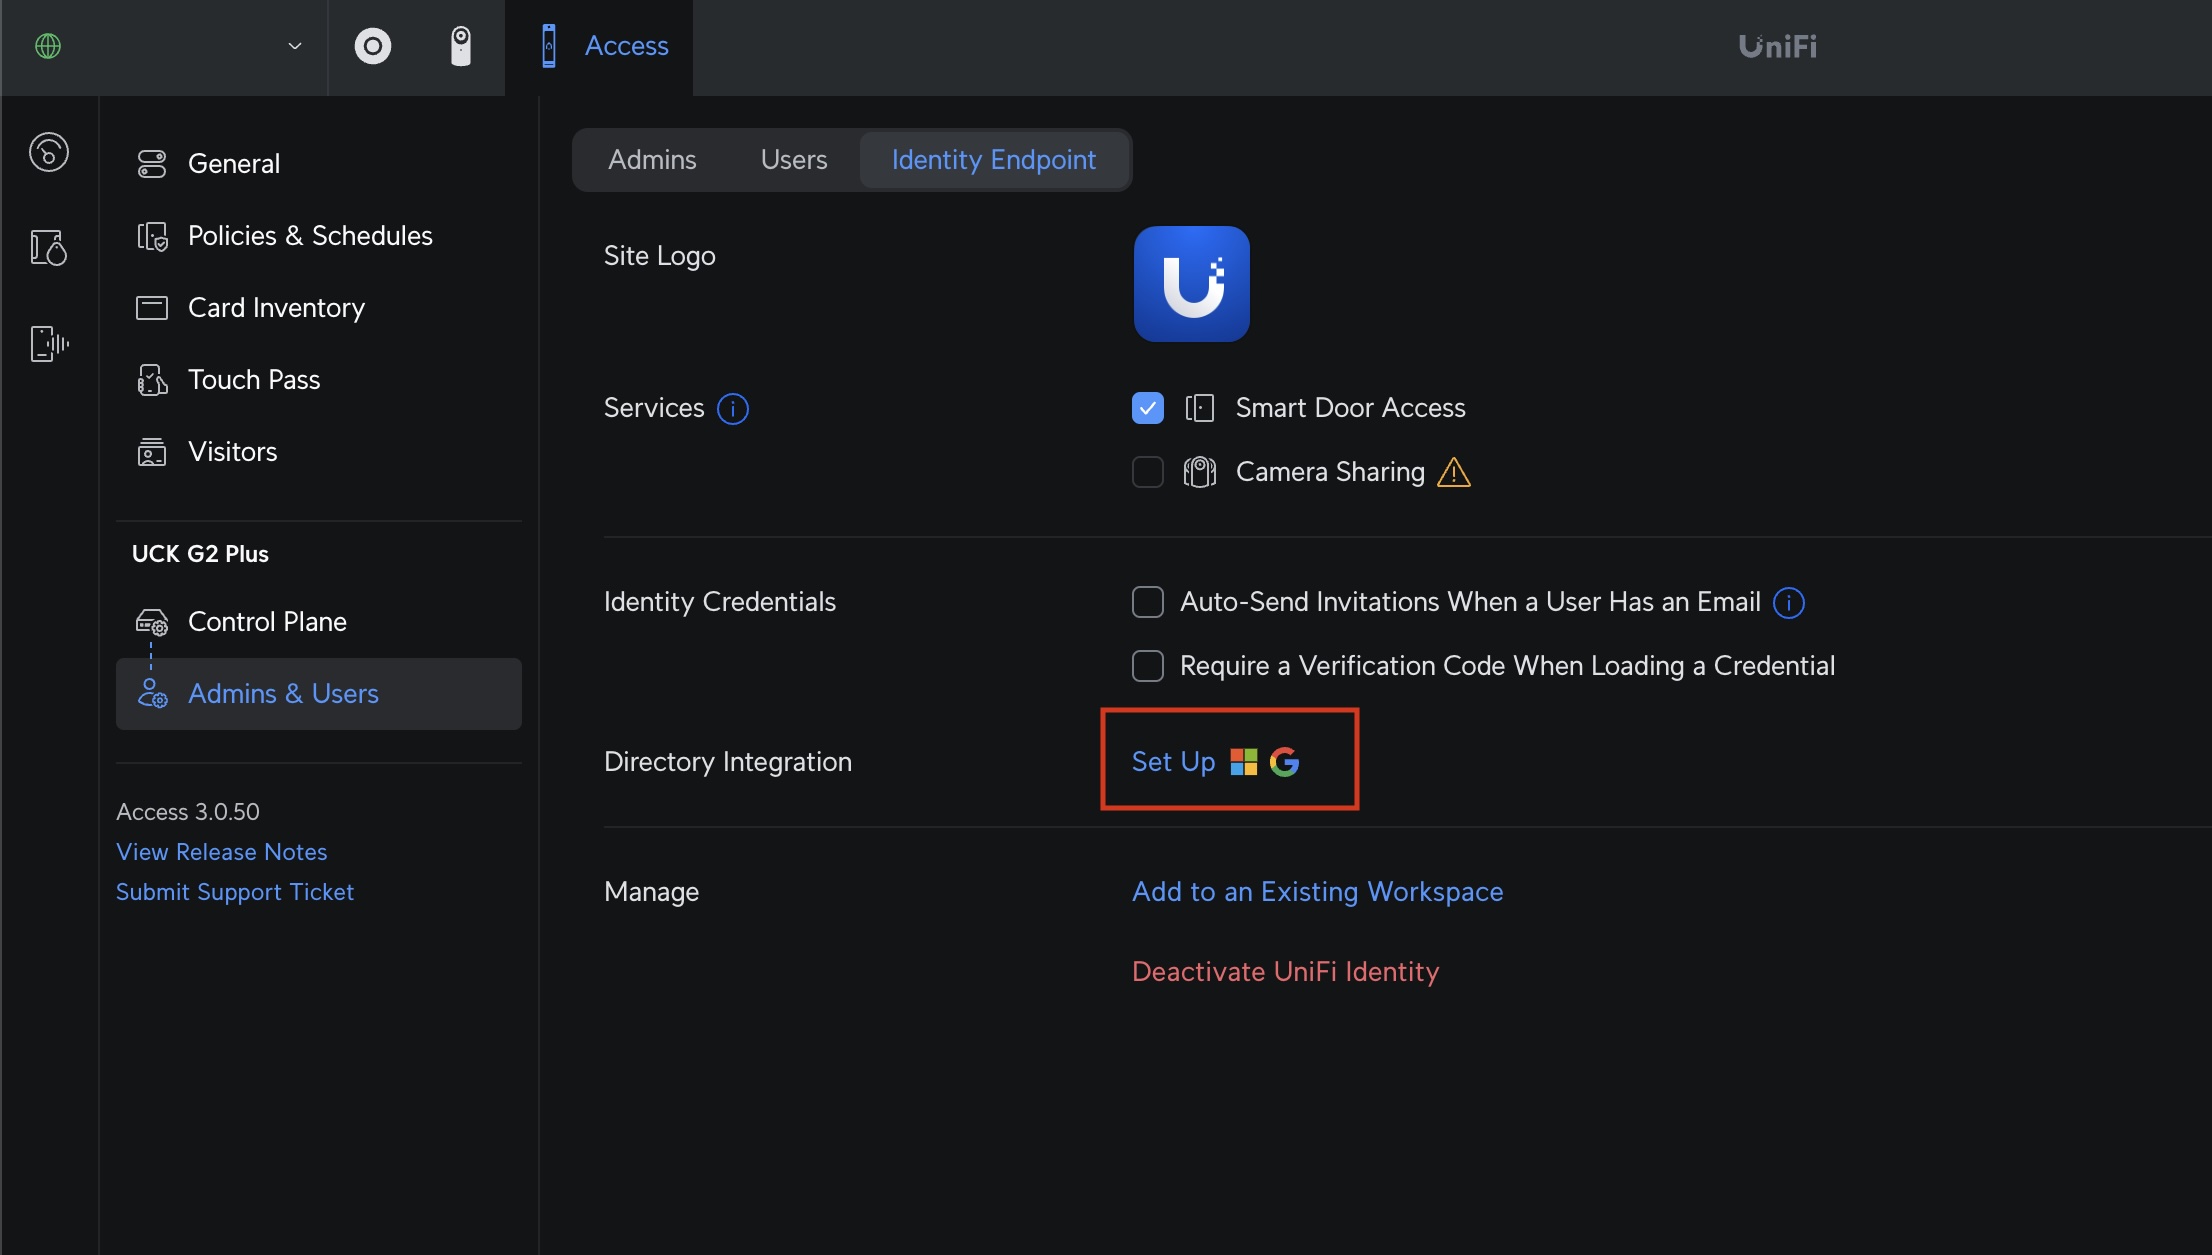
- Select the Identity Endpoint tab and agree to the terms to activate this feature.
Creating the Google LDAP Client
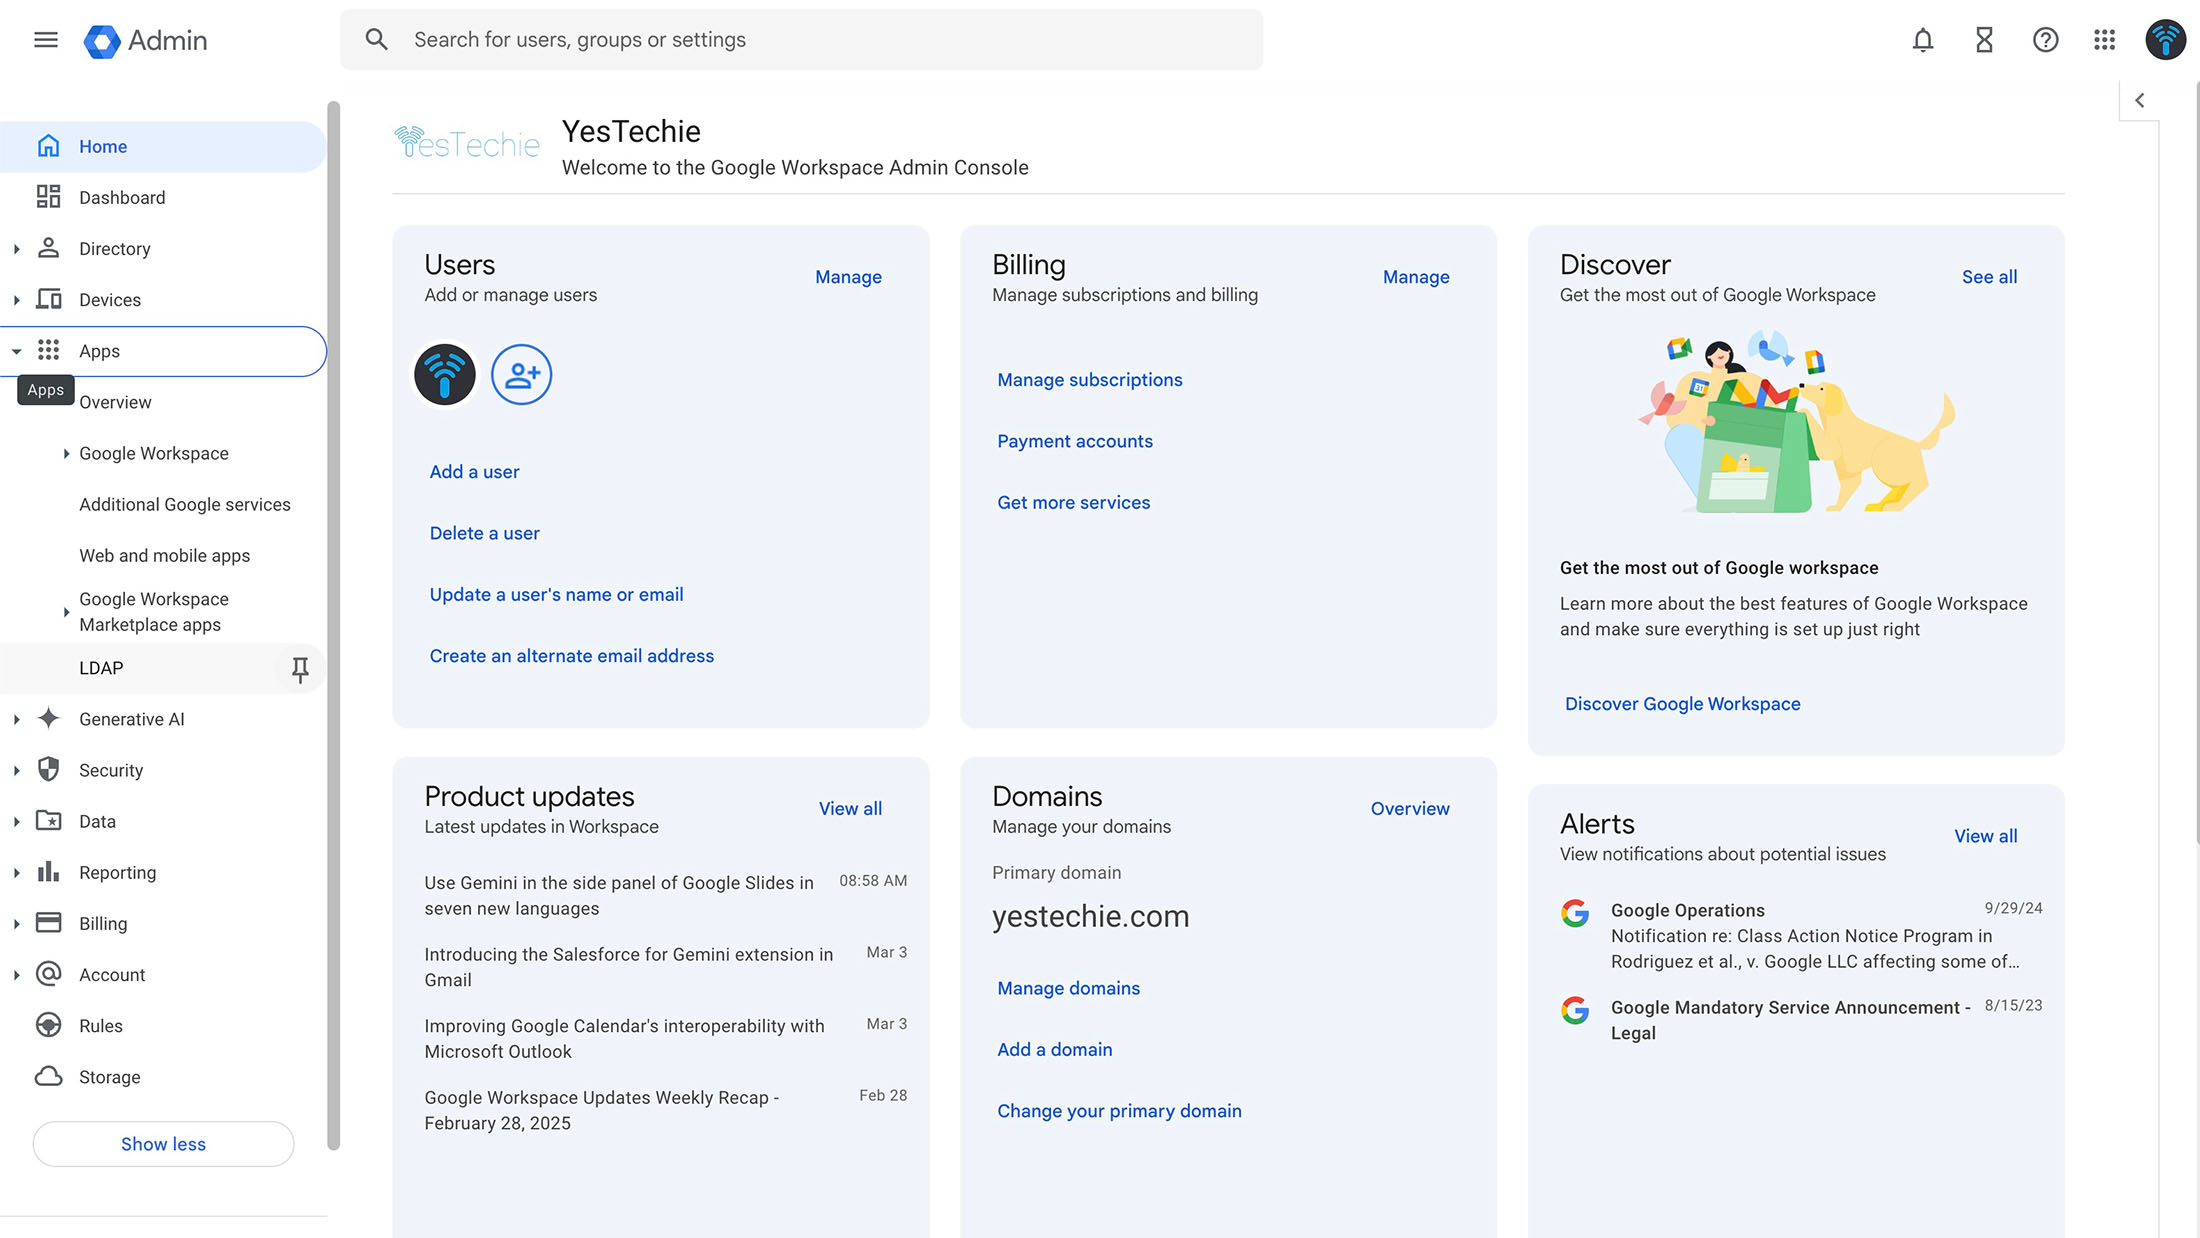
- Log in to your Google Admin console and go to the Apps section.
- Select LDAP. If you don’t see it, double-check that your Google Workspace plan includes LDAP support. Plans with LDAP enabled
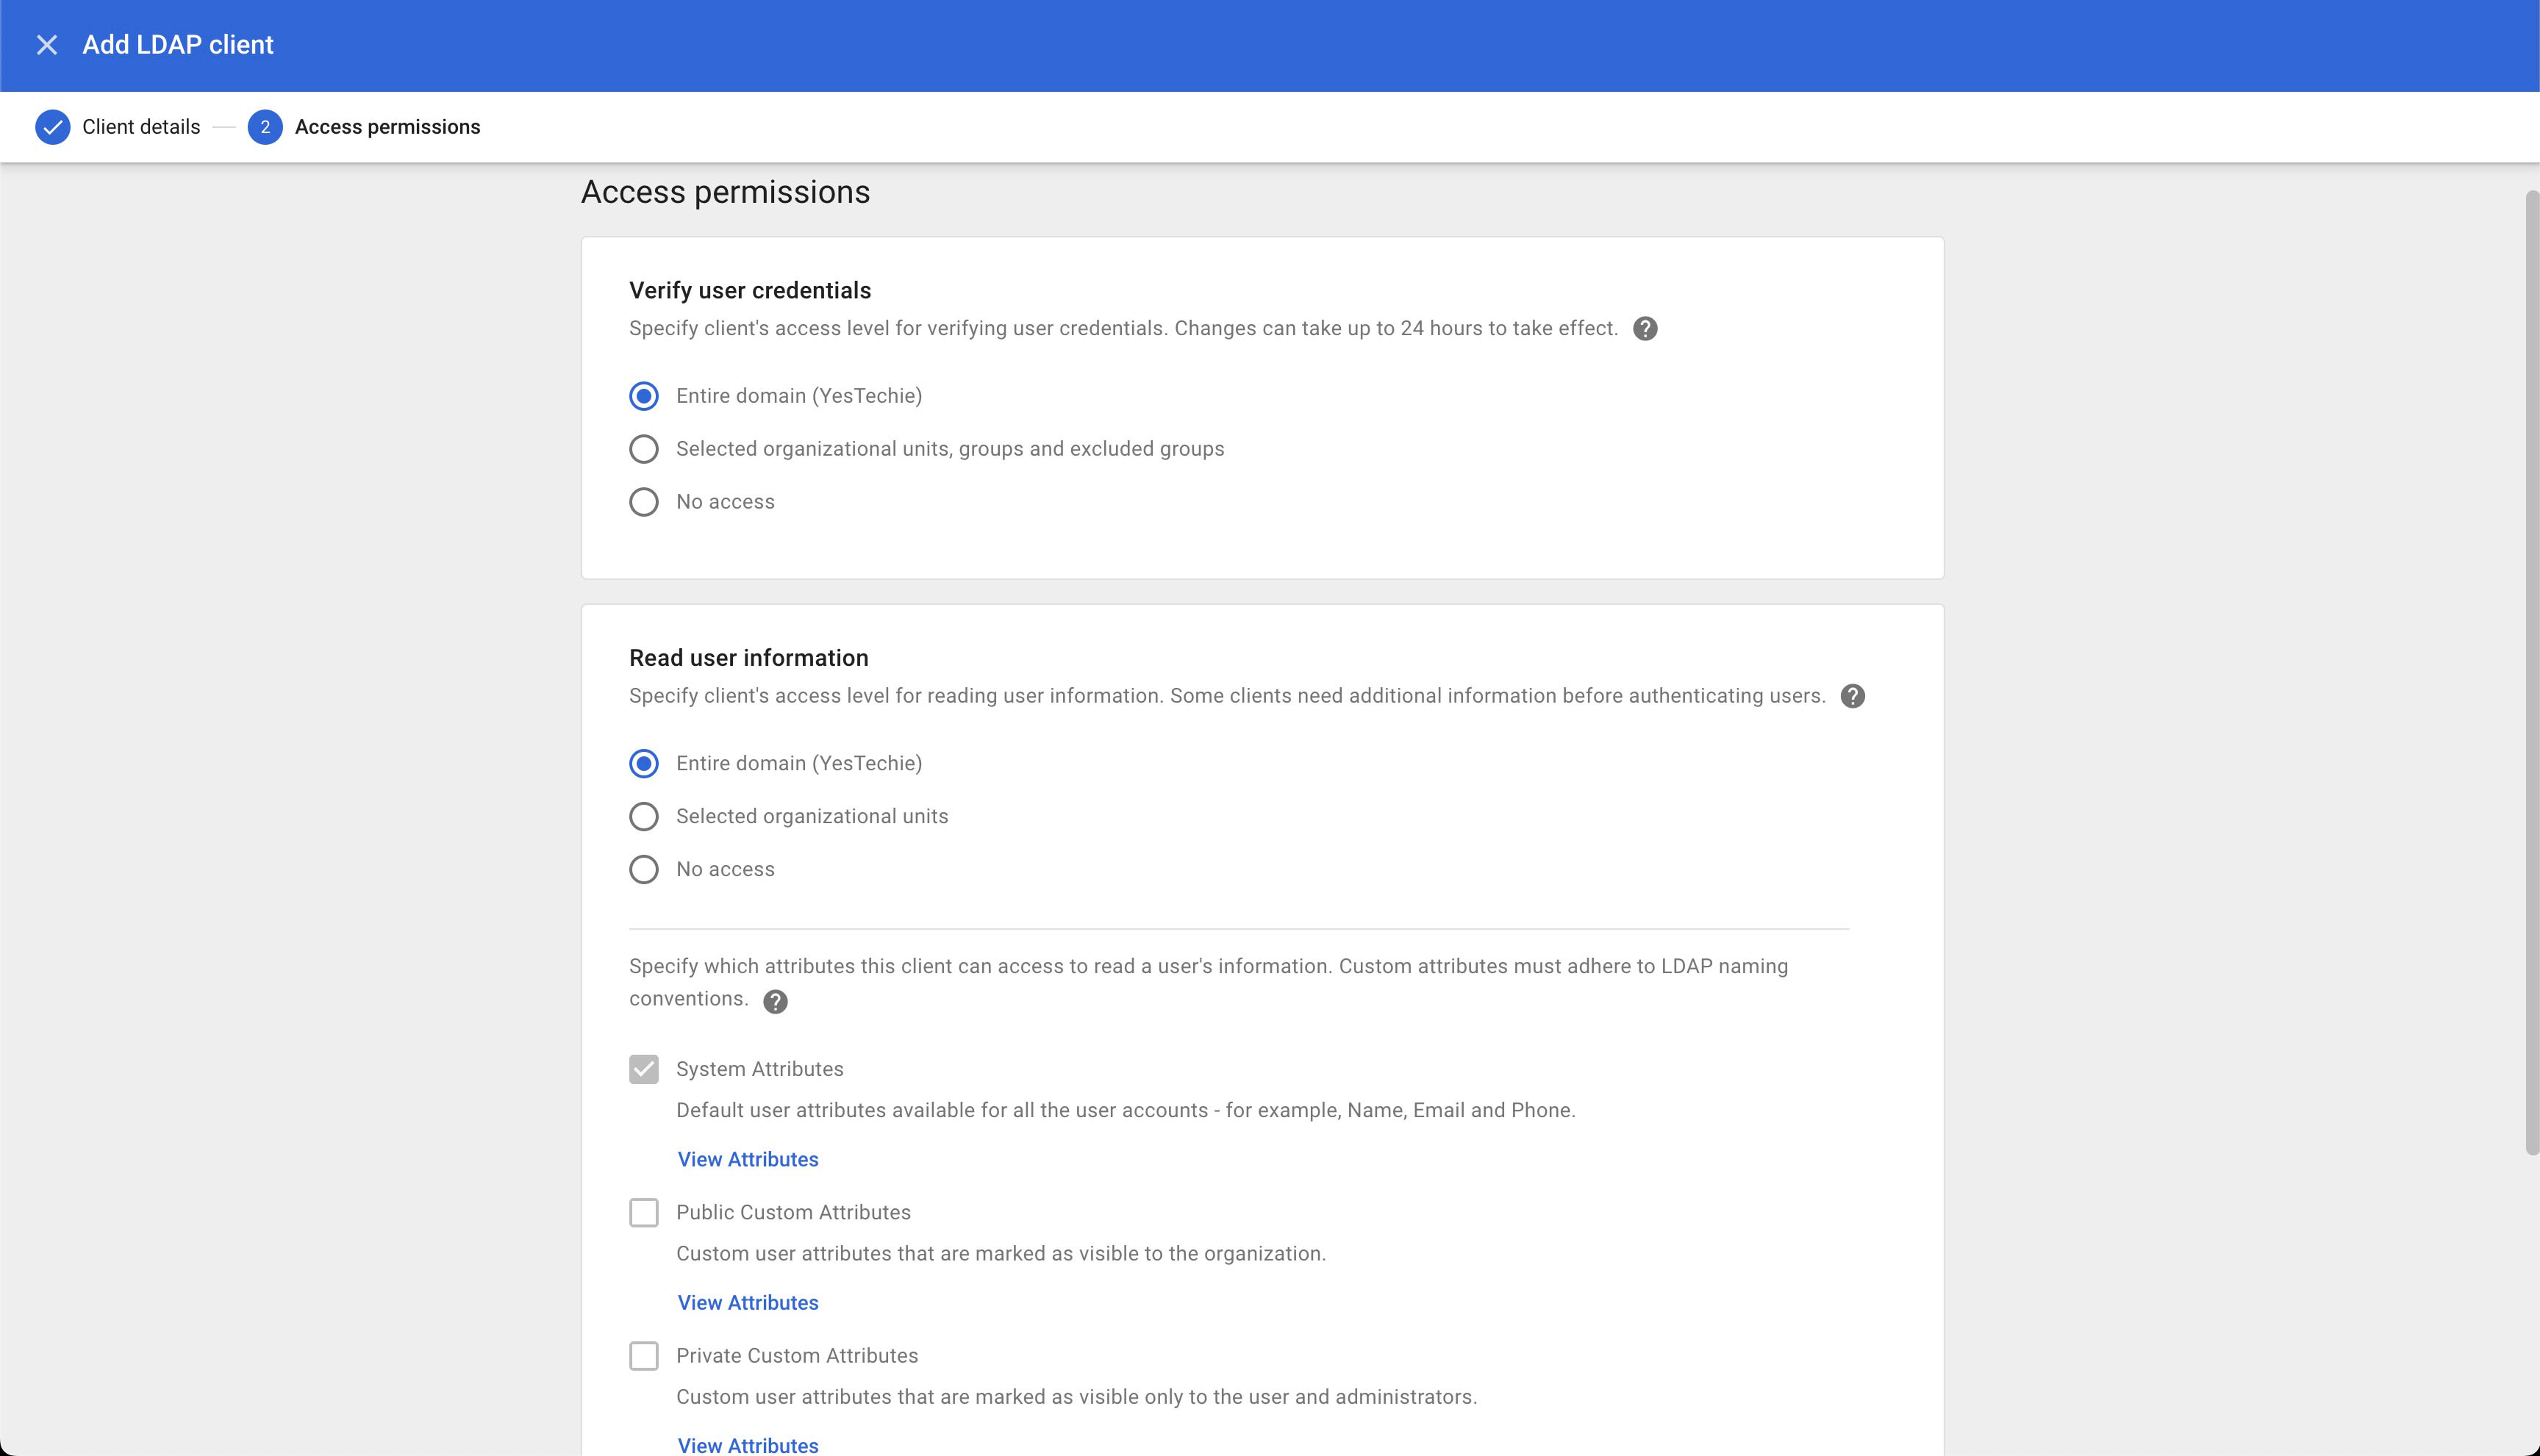
- Click Add LDAP Client and set it up to fit your organization (e.g., pulling all users from yestechie.com).
- Download the certificate - you’ll need it for UniFi.
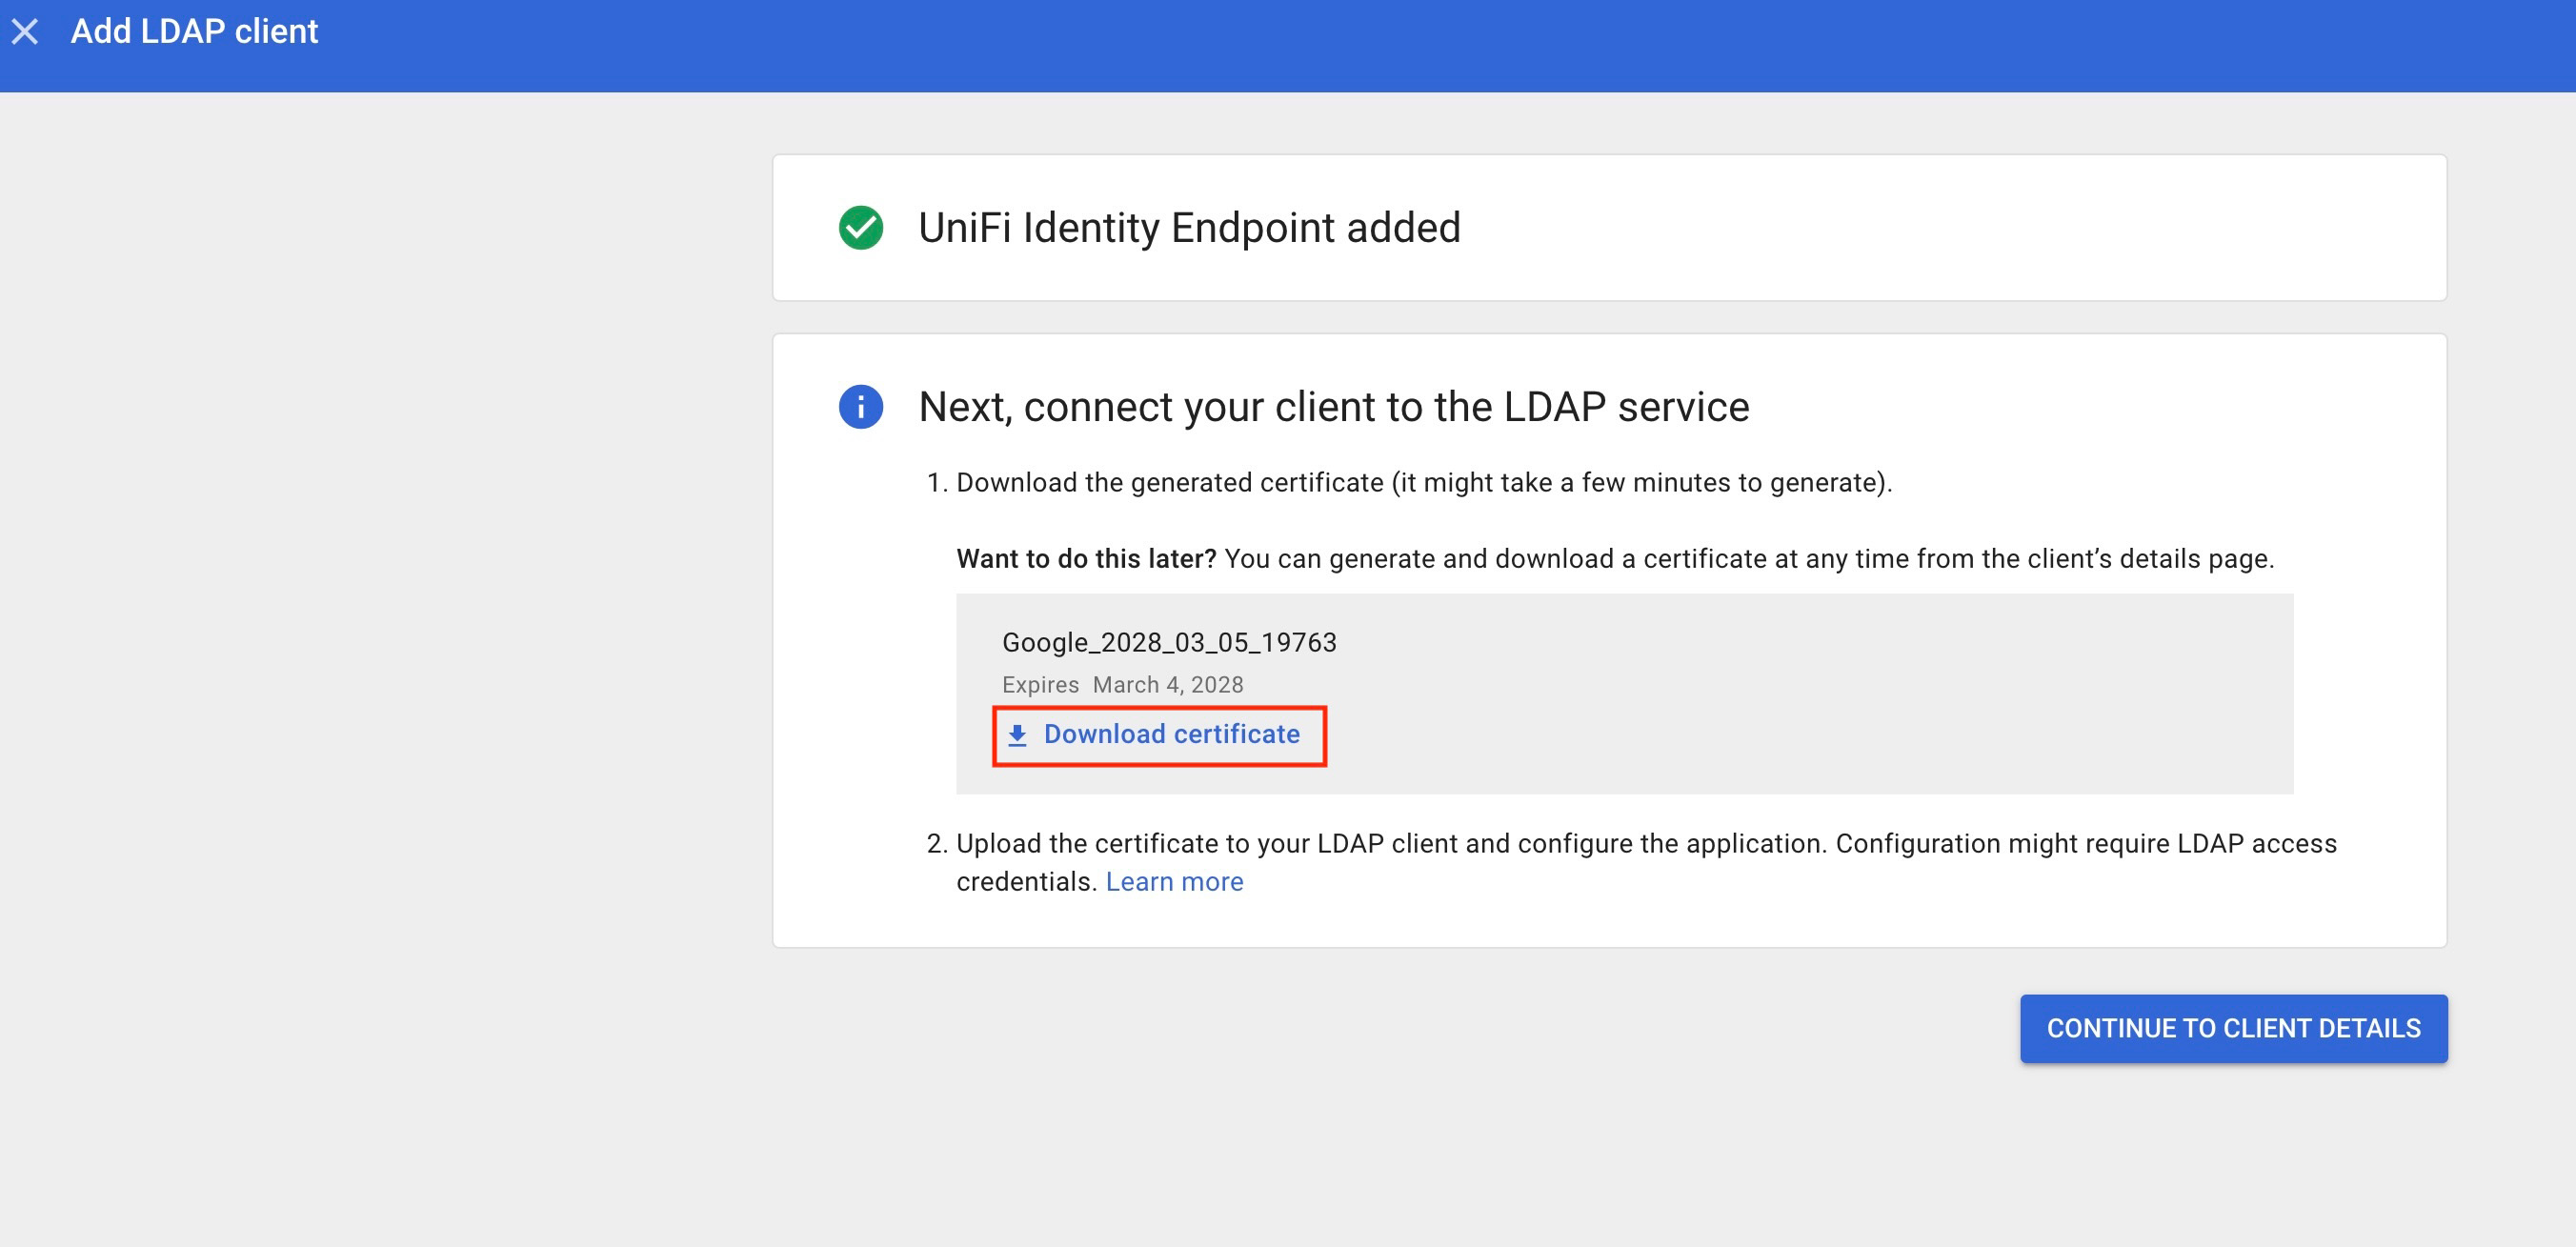
- Click to proceed and review the LDAP client details.
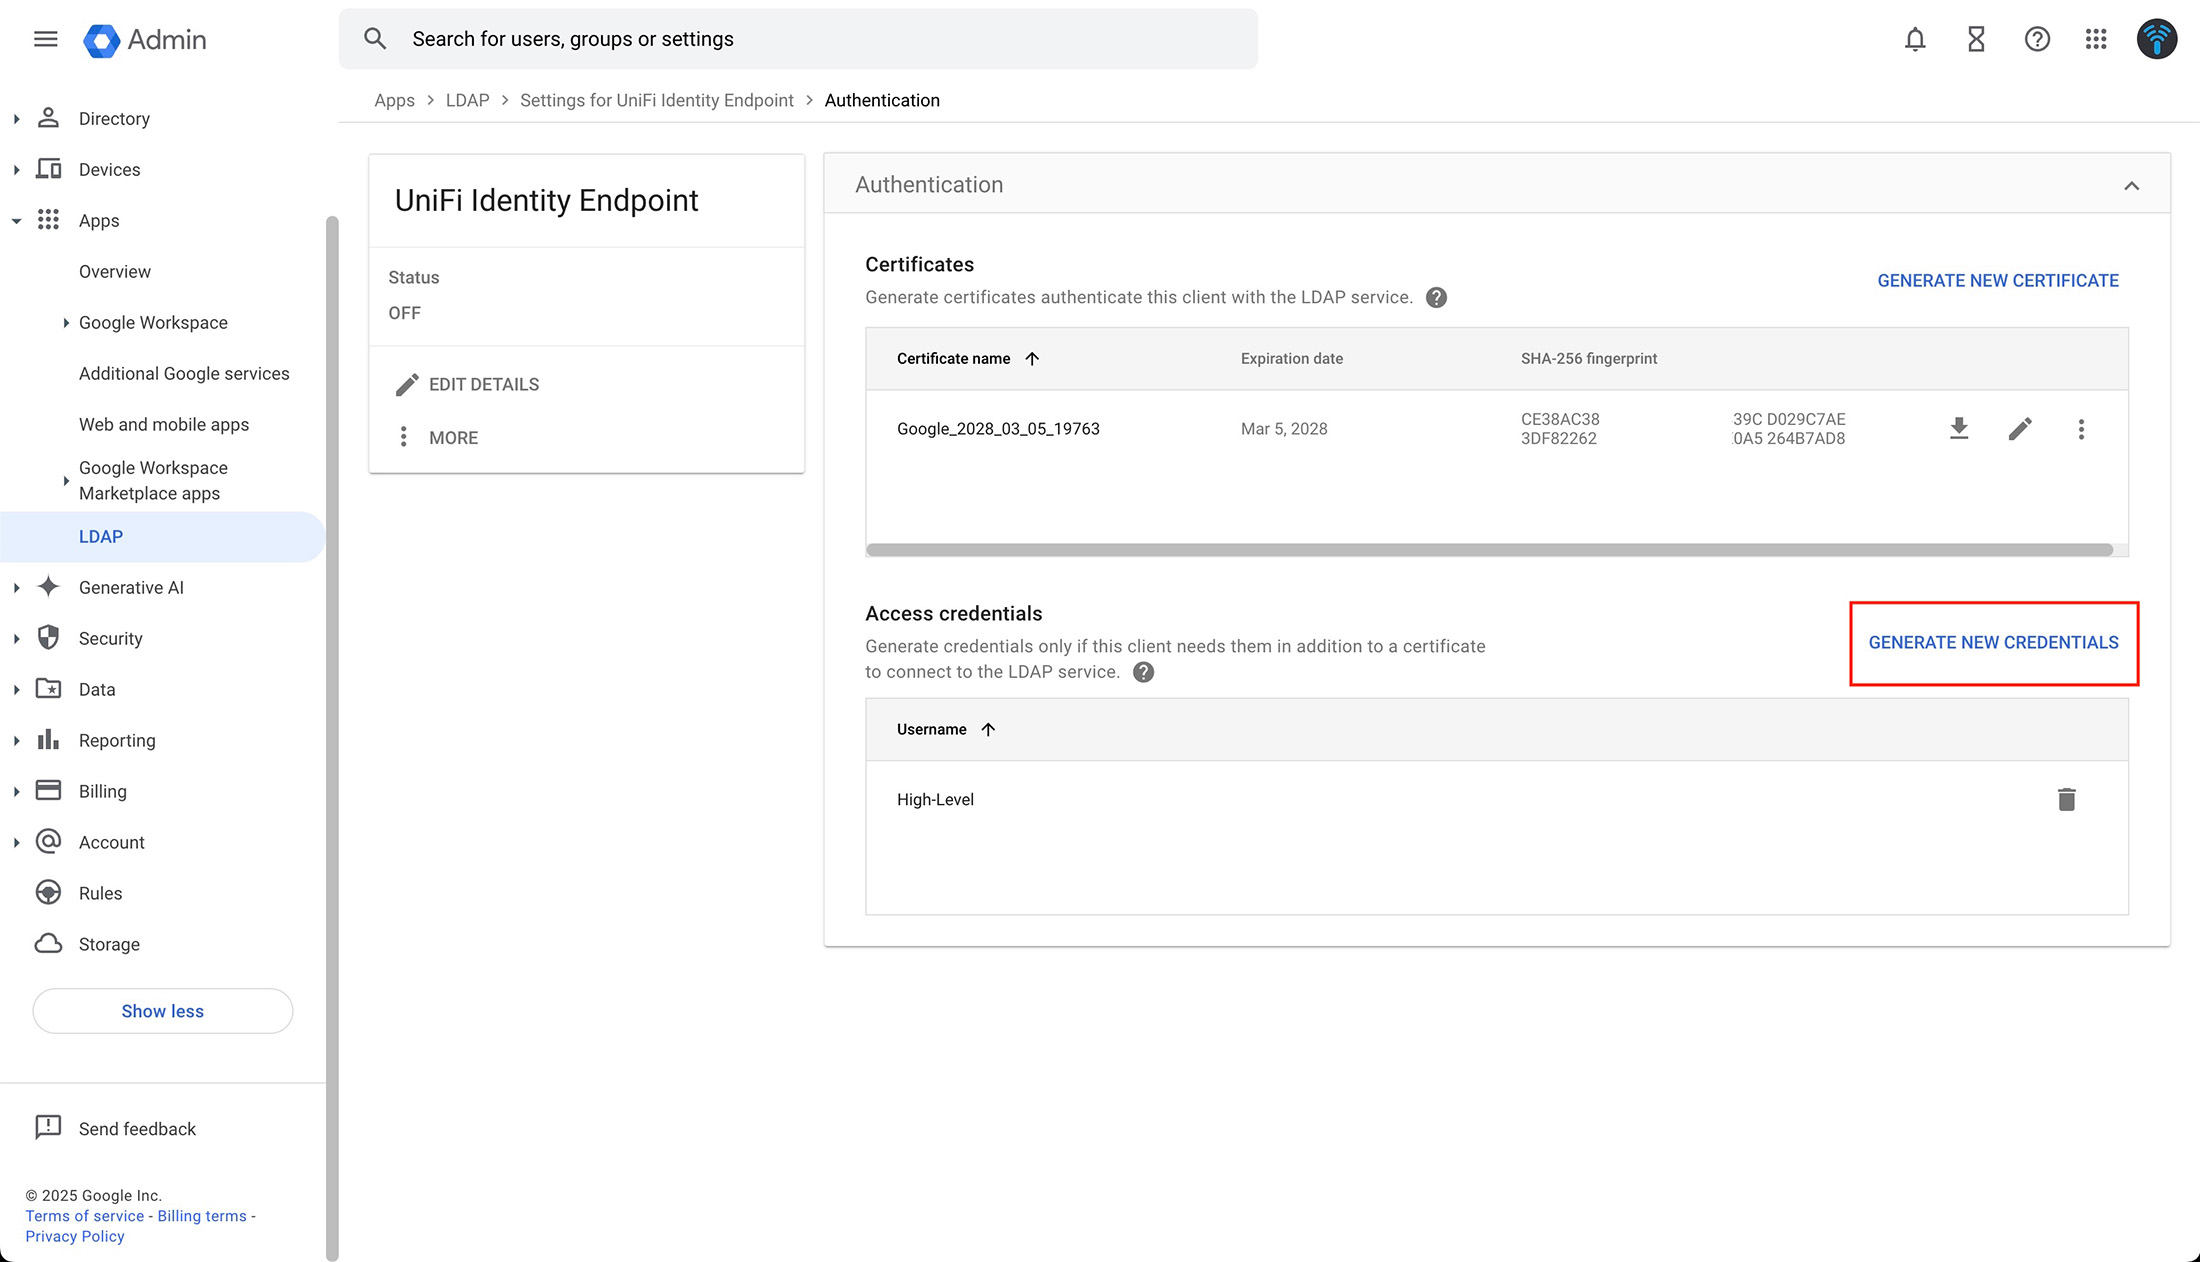
Don’t forget to generate access credentials too. Save the LDAP client’s username and password from the Google Admin interface for the next step.
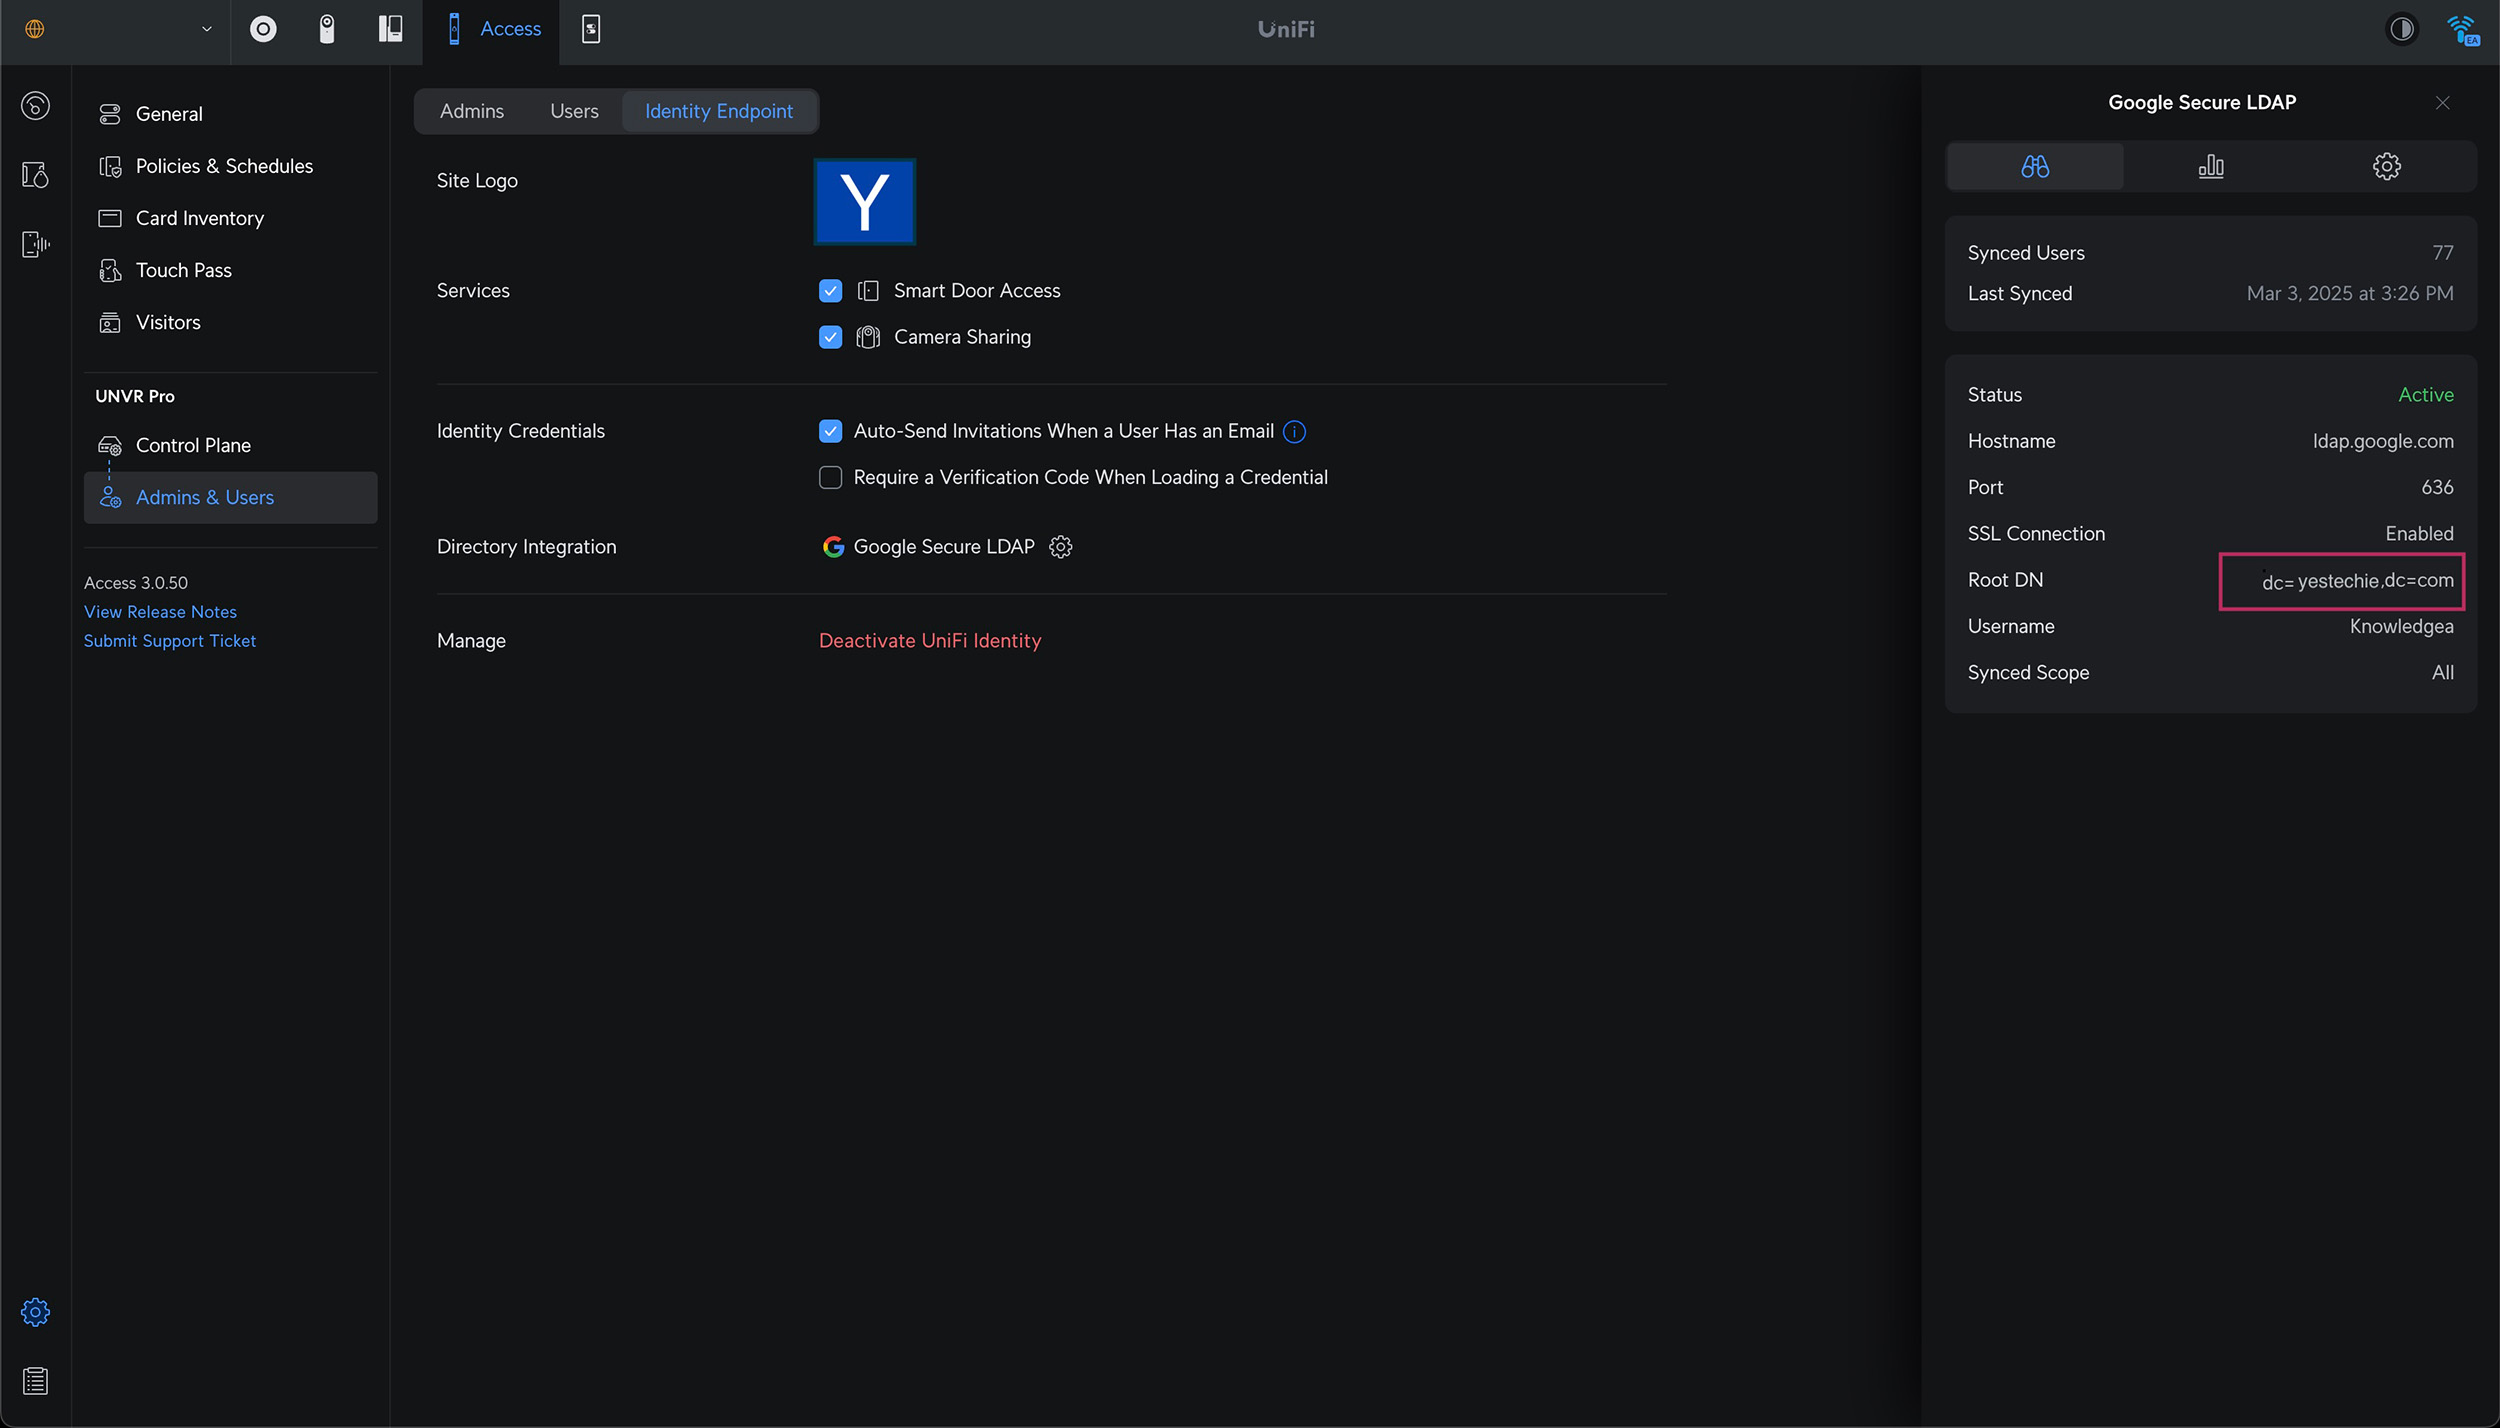
Connecting Google LDAP to UniFi Identity Endpoint
Back in the UniFi web interface, under Identity Endpoint, pick your desired services (like door access or camera sharing), then click Directory Integration.
- Enter your Root DN dc=yestechie,dc=com for the yestechie.com domain. Make sure Root DN is in the correct format with no spaces.
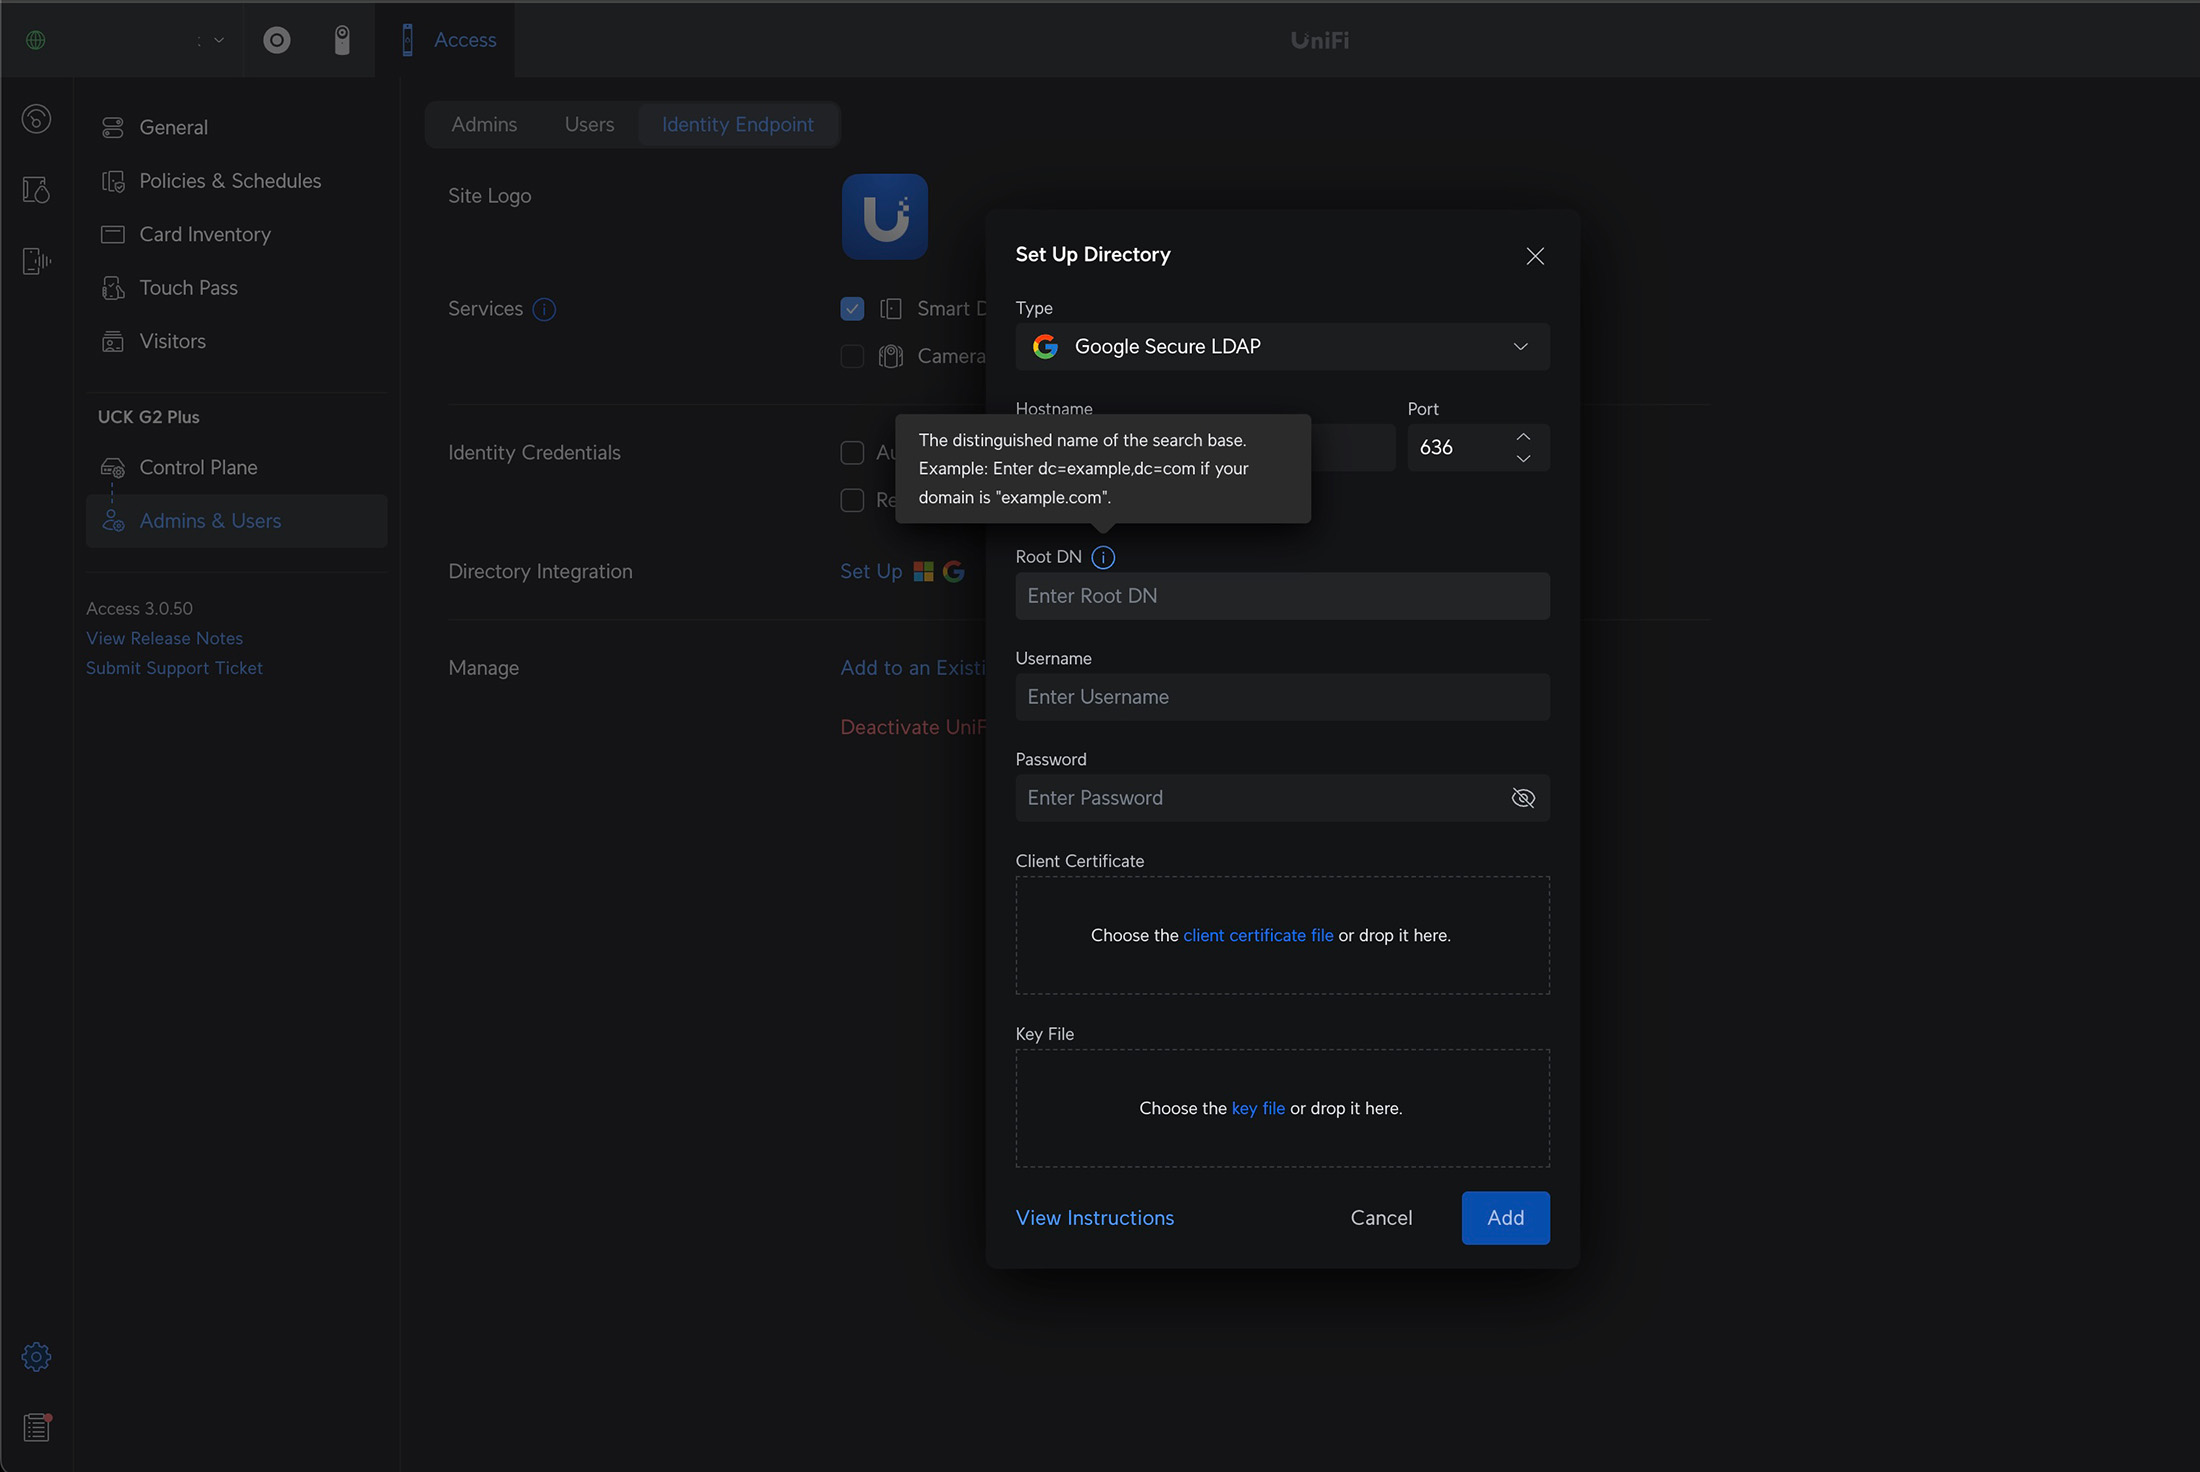
- Input the LDAP access credentials - username and password you generated in the Google Admin Console, and upload the certificate you downloaded earlier.
- Hit ADD to kick off the synchronization.
Optional: Automate Permissions with Group Mapping
Want to simplify permission management? Group mapping is the way to go! By connecting UniFi Access groups to your existing Google Workspace groups, you can automate access permissions and keep everything running smoothly. It’s a clever way to stay organized and efficient. Let’s walk through the setup together.
Before we jump into mapping, we’ll need to lay the groundwork by creating access policies and user groups in UniFi Access. This ensures everything’s ready when we tie it all together with Google Workspace.
Step 1: Create Access Policies
First, let’s define who gets access to what and when:
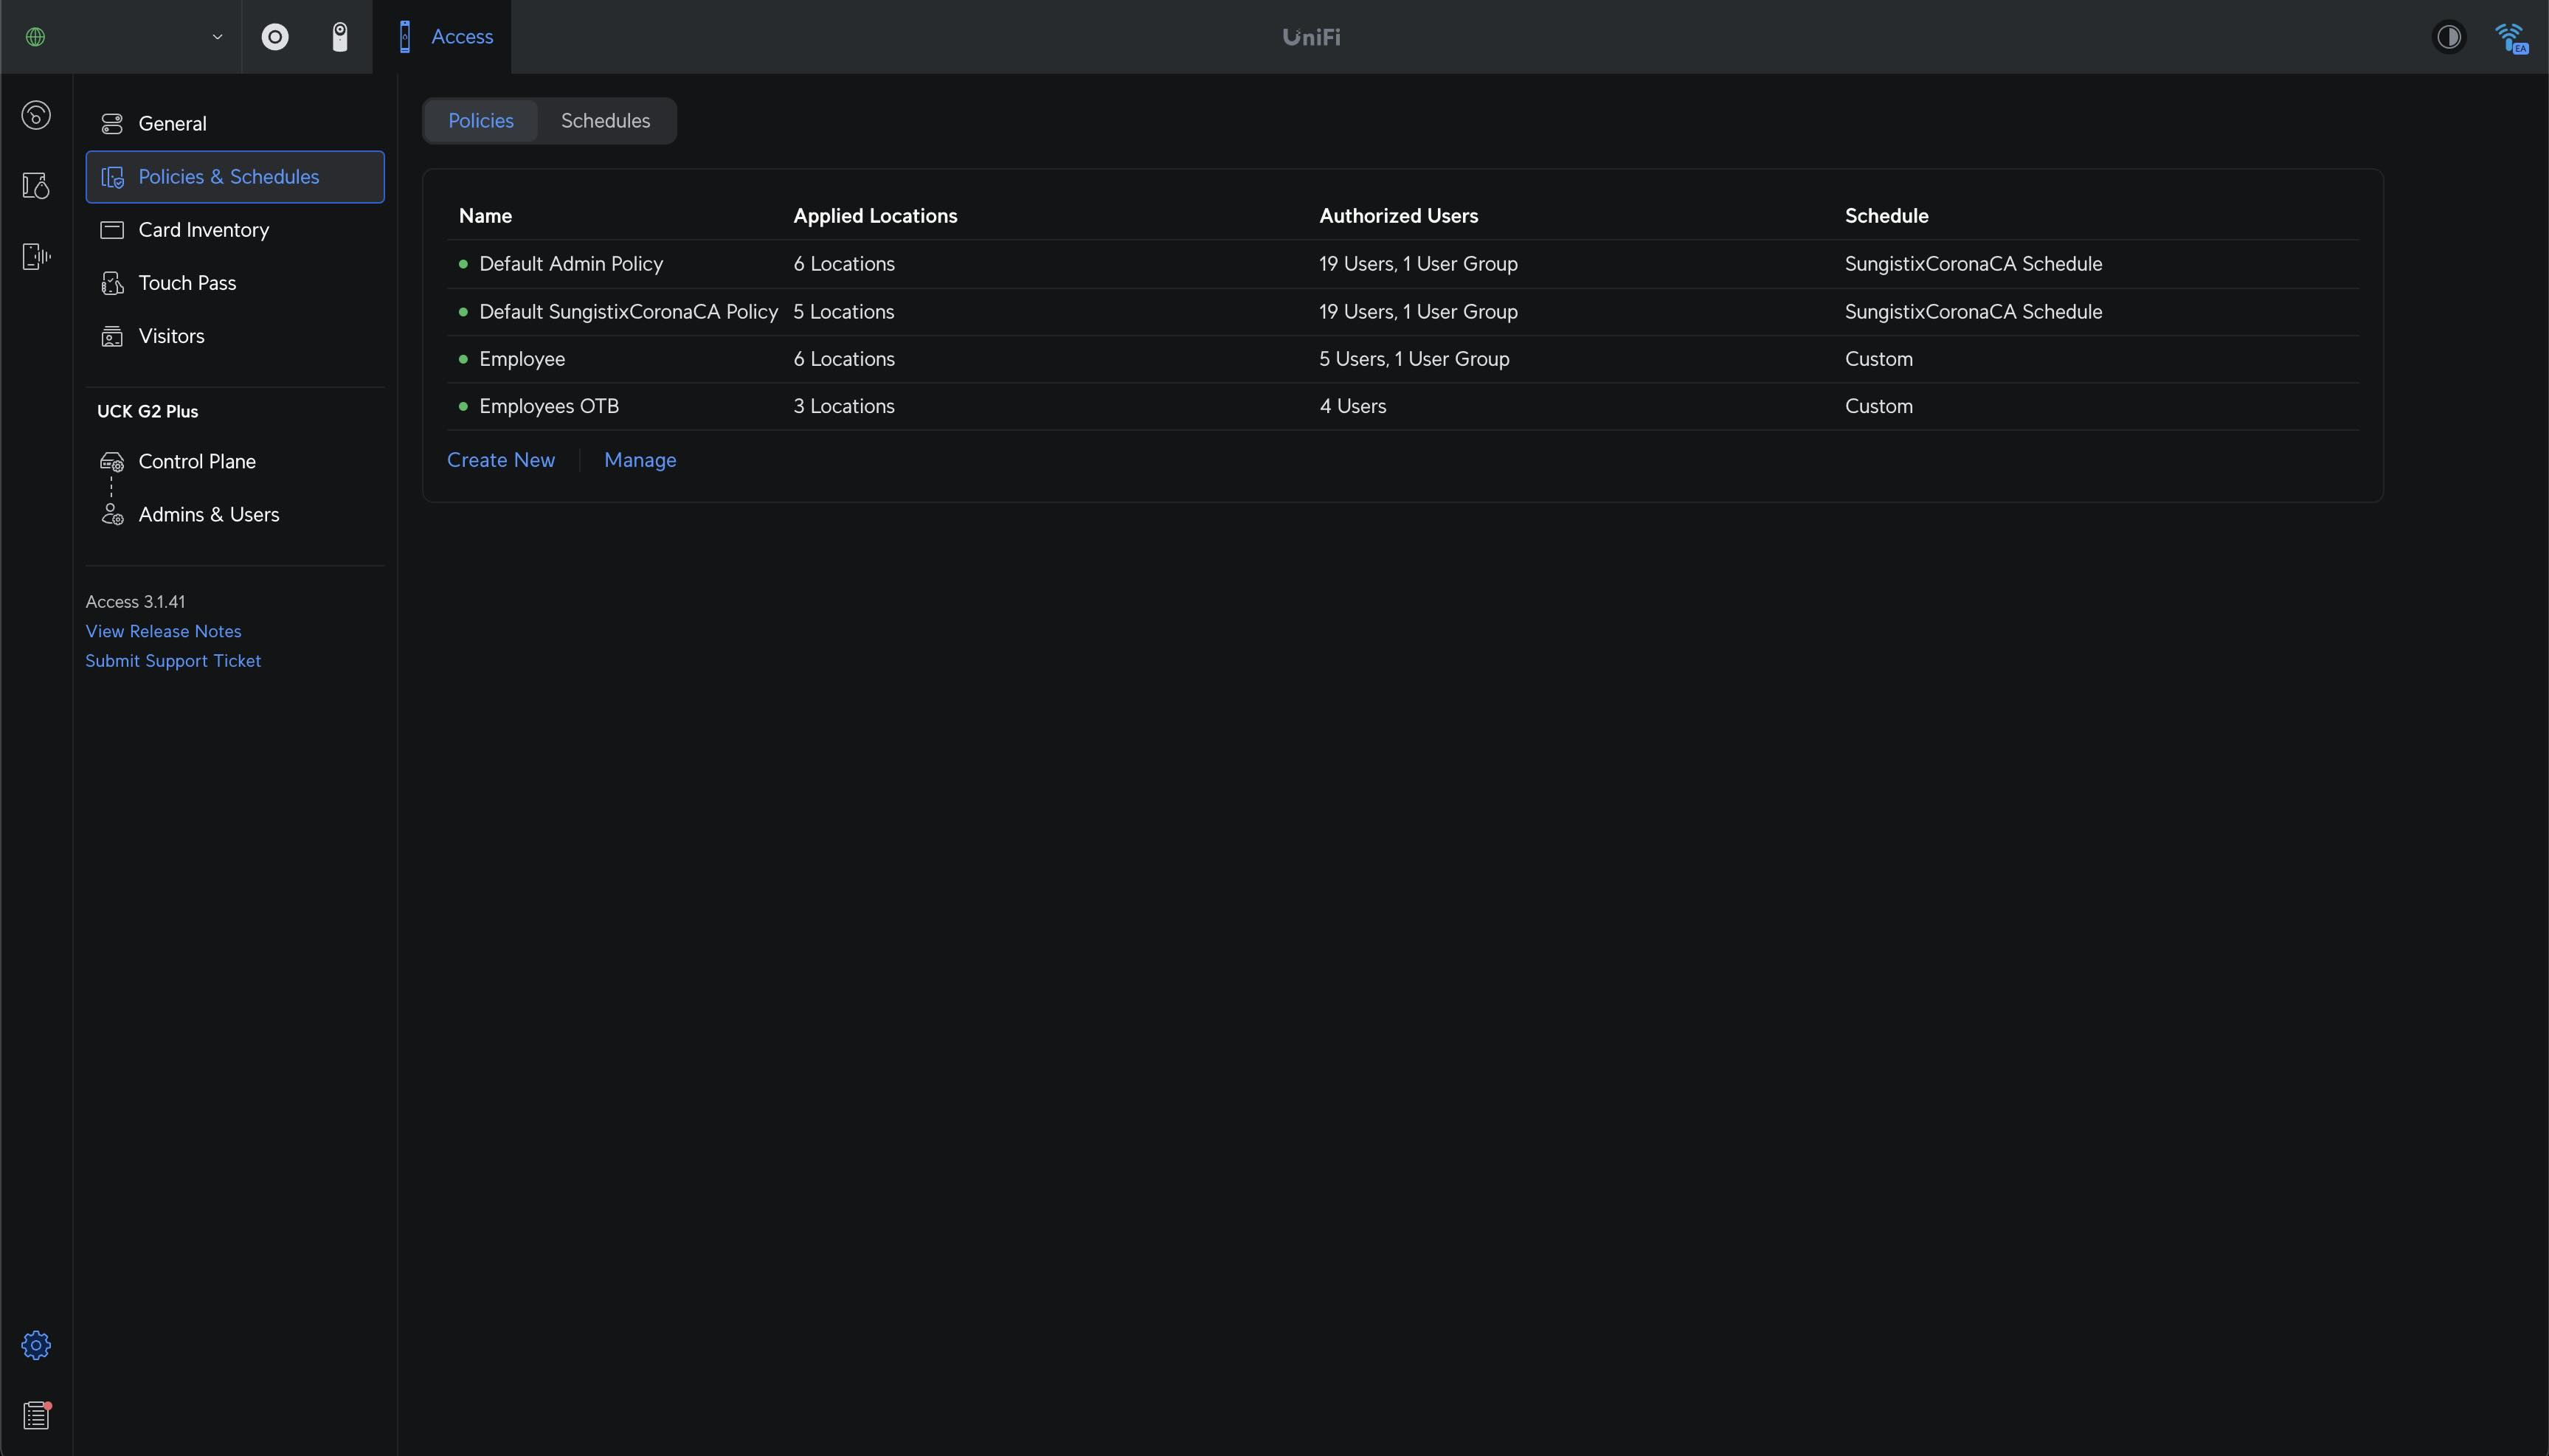
- Head to Settings and select Policies & Schedules.
- Click Create New to start building a new policy.
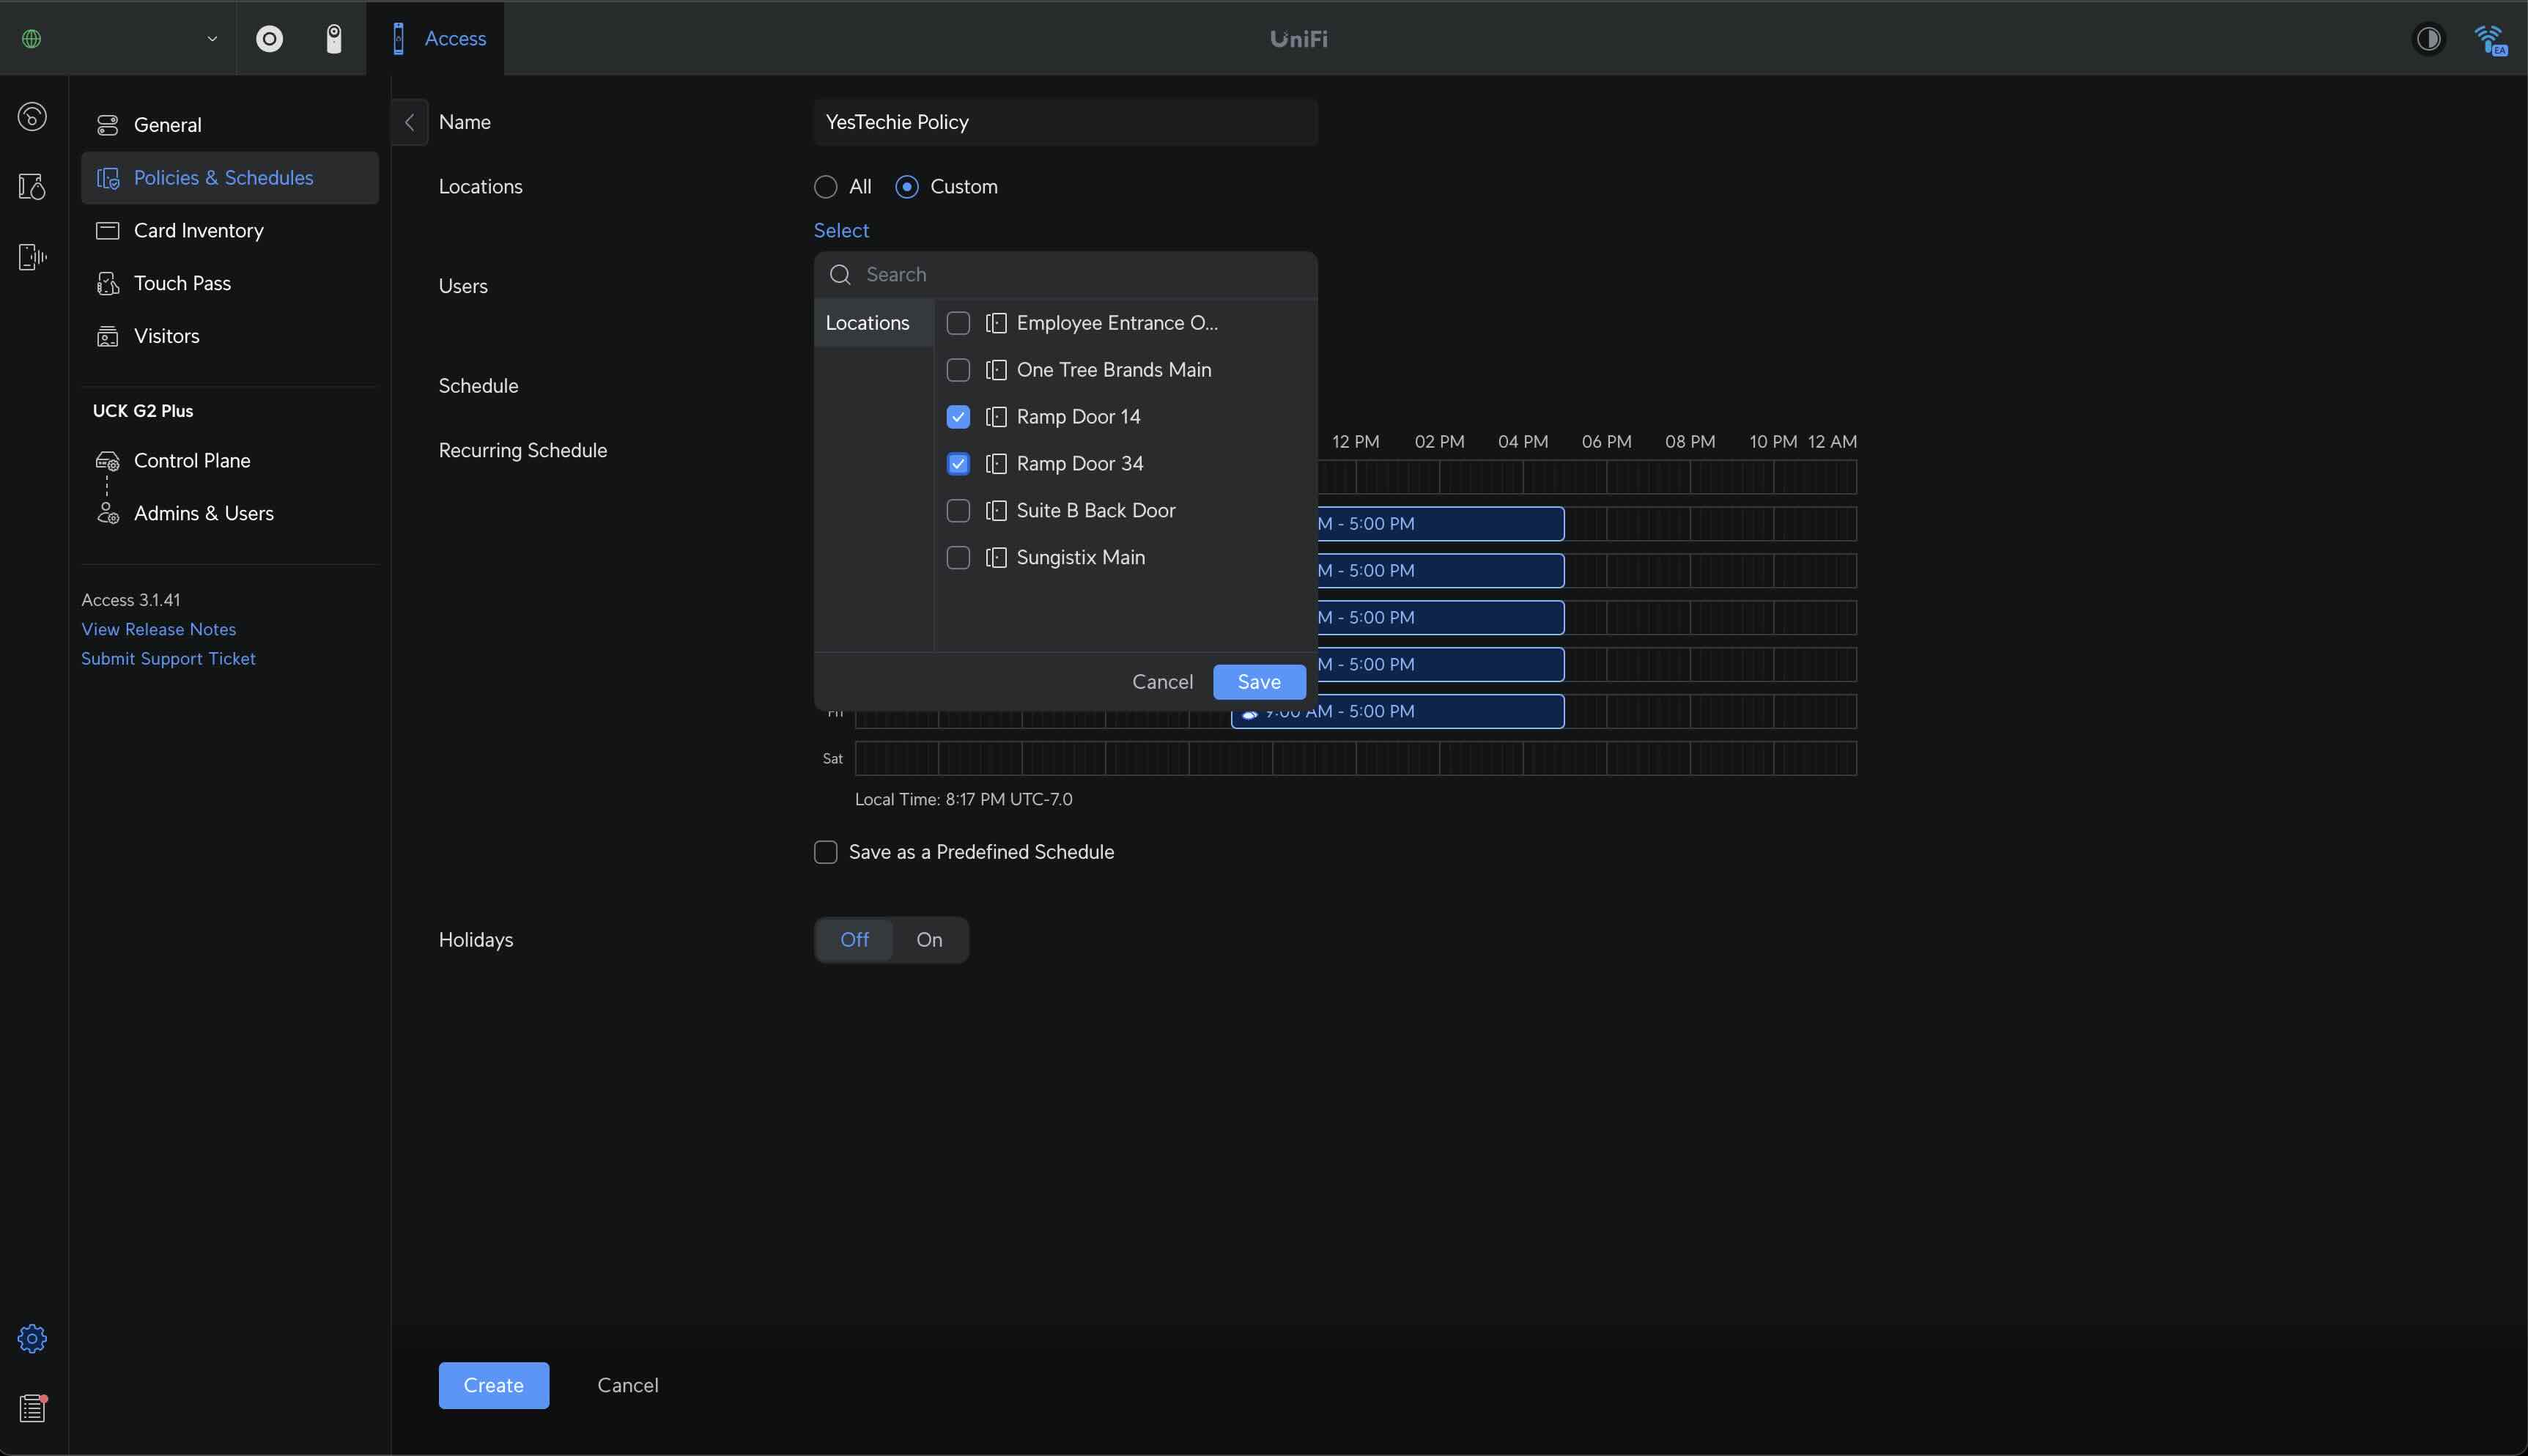
- For Locations, pick Custom and choose the doors this policy will control.
- For Users, select Custom. We’ll fill this in later with users synced from Google LDAP.
- Want time-based access? Optionally, set up Schedules to specify when the policy applies.
- Hit Create to save your shiny new policy.
Step 2: Create User Groups
Next, let’s group our users and link them to the policy we just made:
- Navigate back to Admins & Users and click the Users tab.
- Select Manage Groups, then click Create New.
- Give your group a clear name—like “Office Staff”—to keep things intuitive.
- Under Assignments, click Add Access Policies and pick the policy you created earlier.
- Click Create to lock it in.

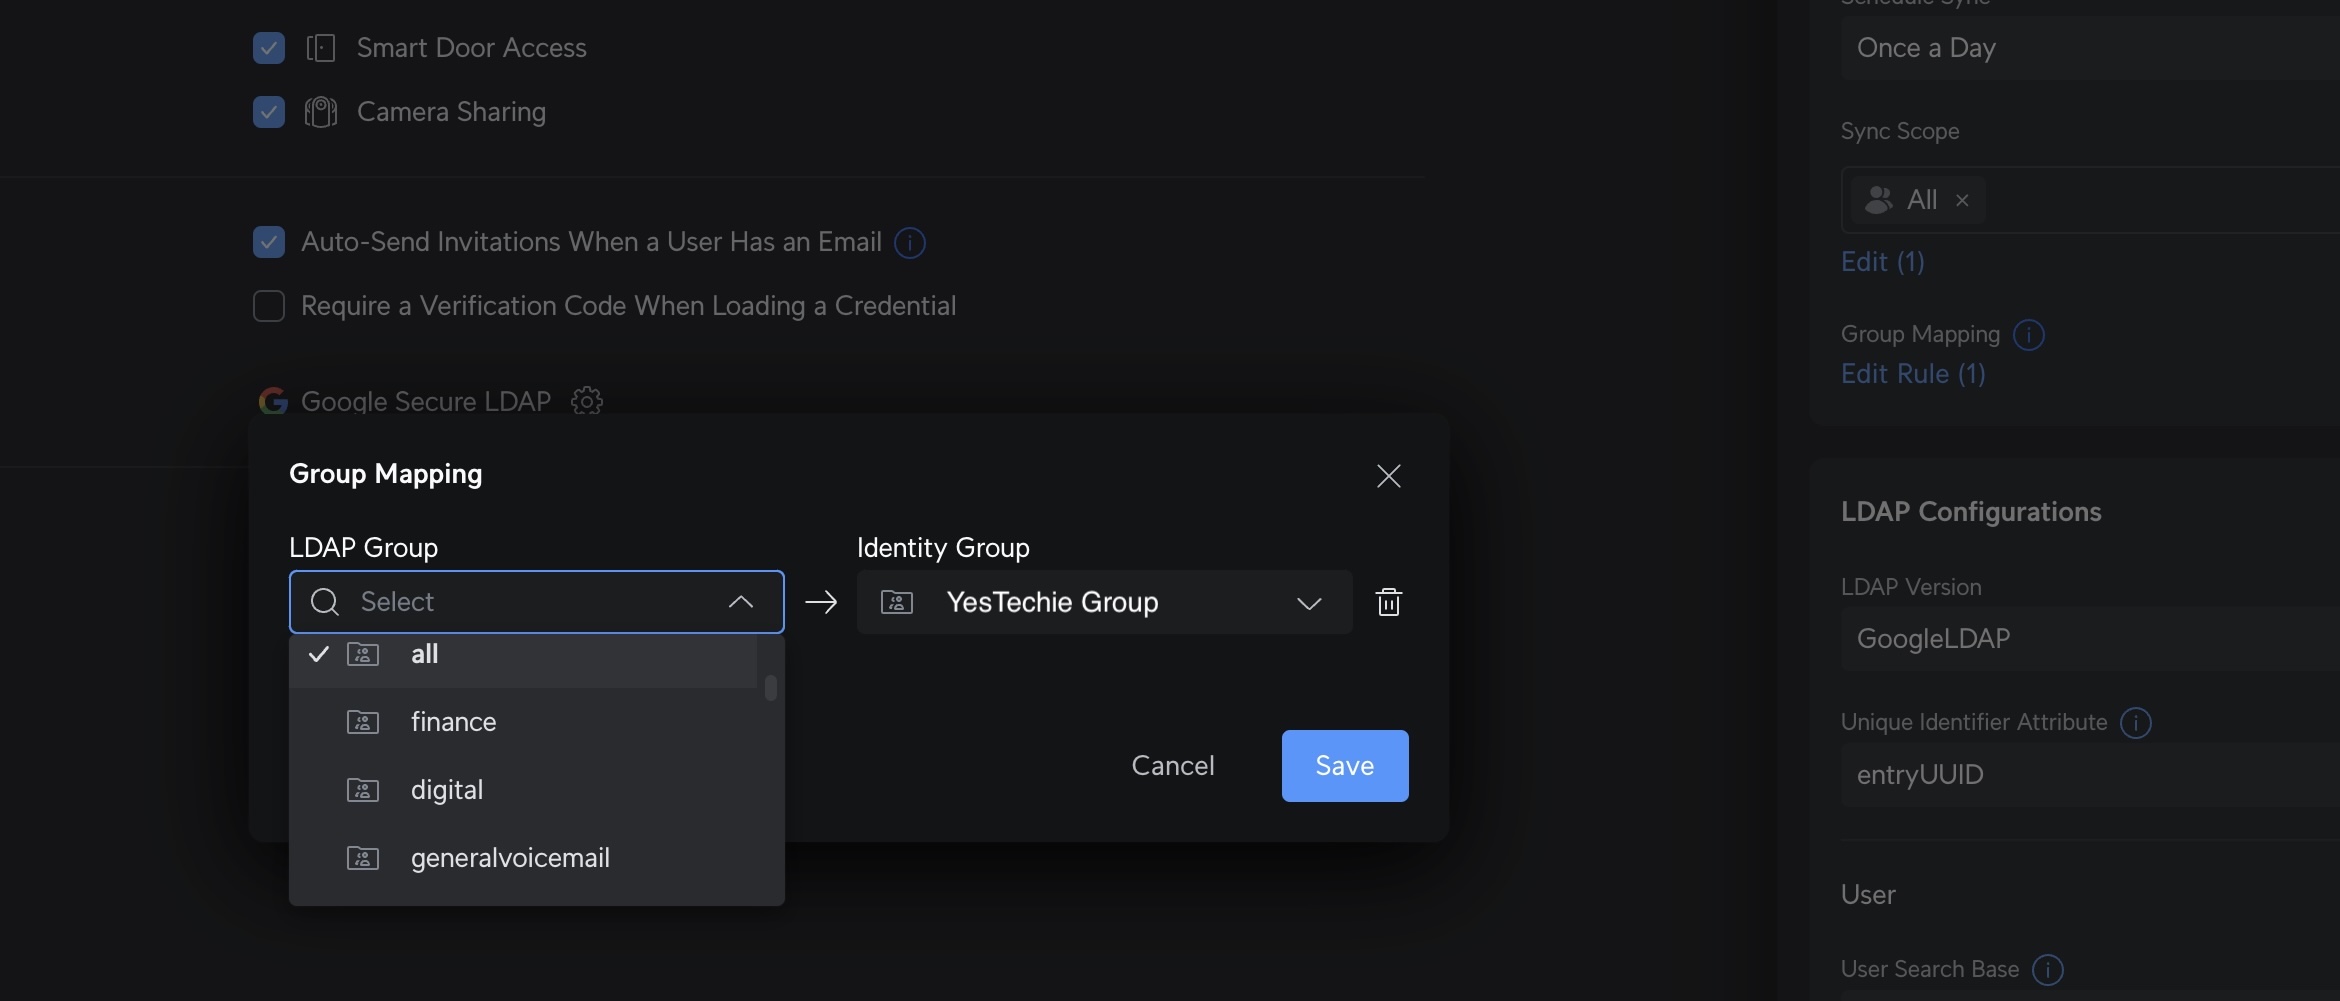
Step 3: Set Up Group Mapping
Now for the fun part - connecting your UniFi Access groups to Google Workspace:
- Go to the Identity Endpoint tab.
- Click on your Google LDAP directory and head to its settings.
- Choose Group Mapping.
- Map your existing Google Workspace groups to the UniFi Access groups you just created. This links the groups, automatically applying the attached policies and schedules to users based on their Google group membership.
Why This Works
With group mapping in place, you’ve just streamlined access management! Permissions will stay in sync with your Google Workspace directory, updating automatically as your team evolves. It’s a powerful, time-saving feature that keeps your UniFi Access system humming along.
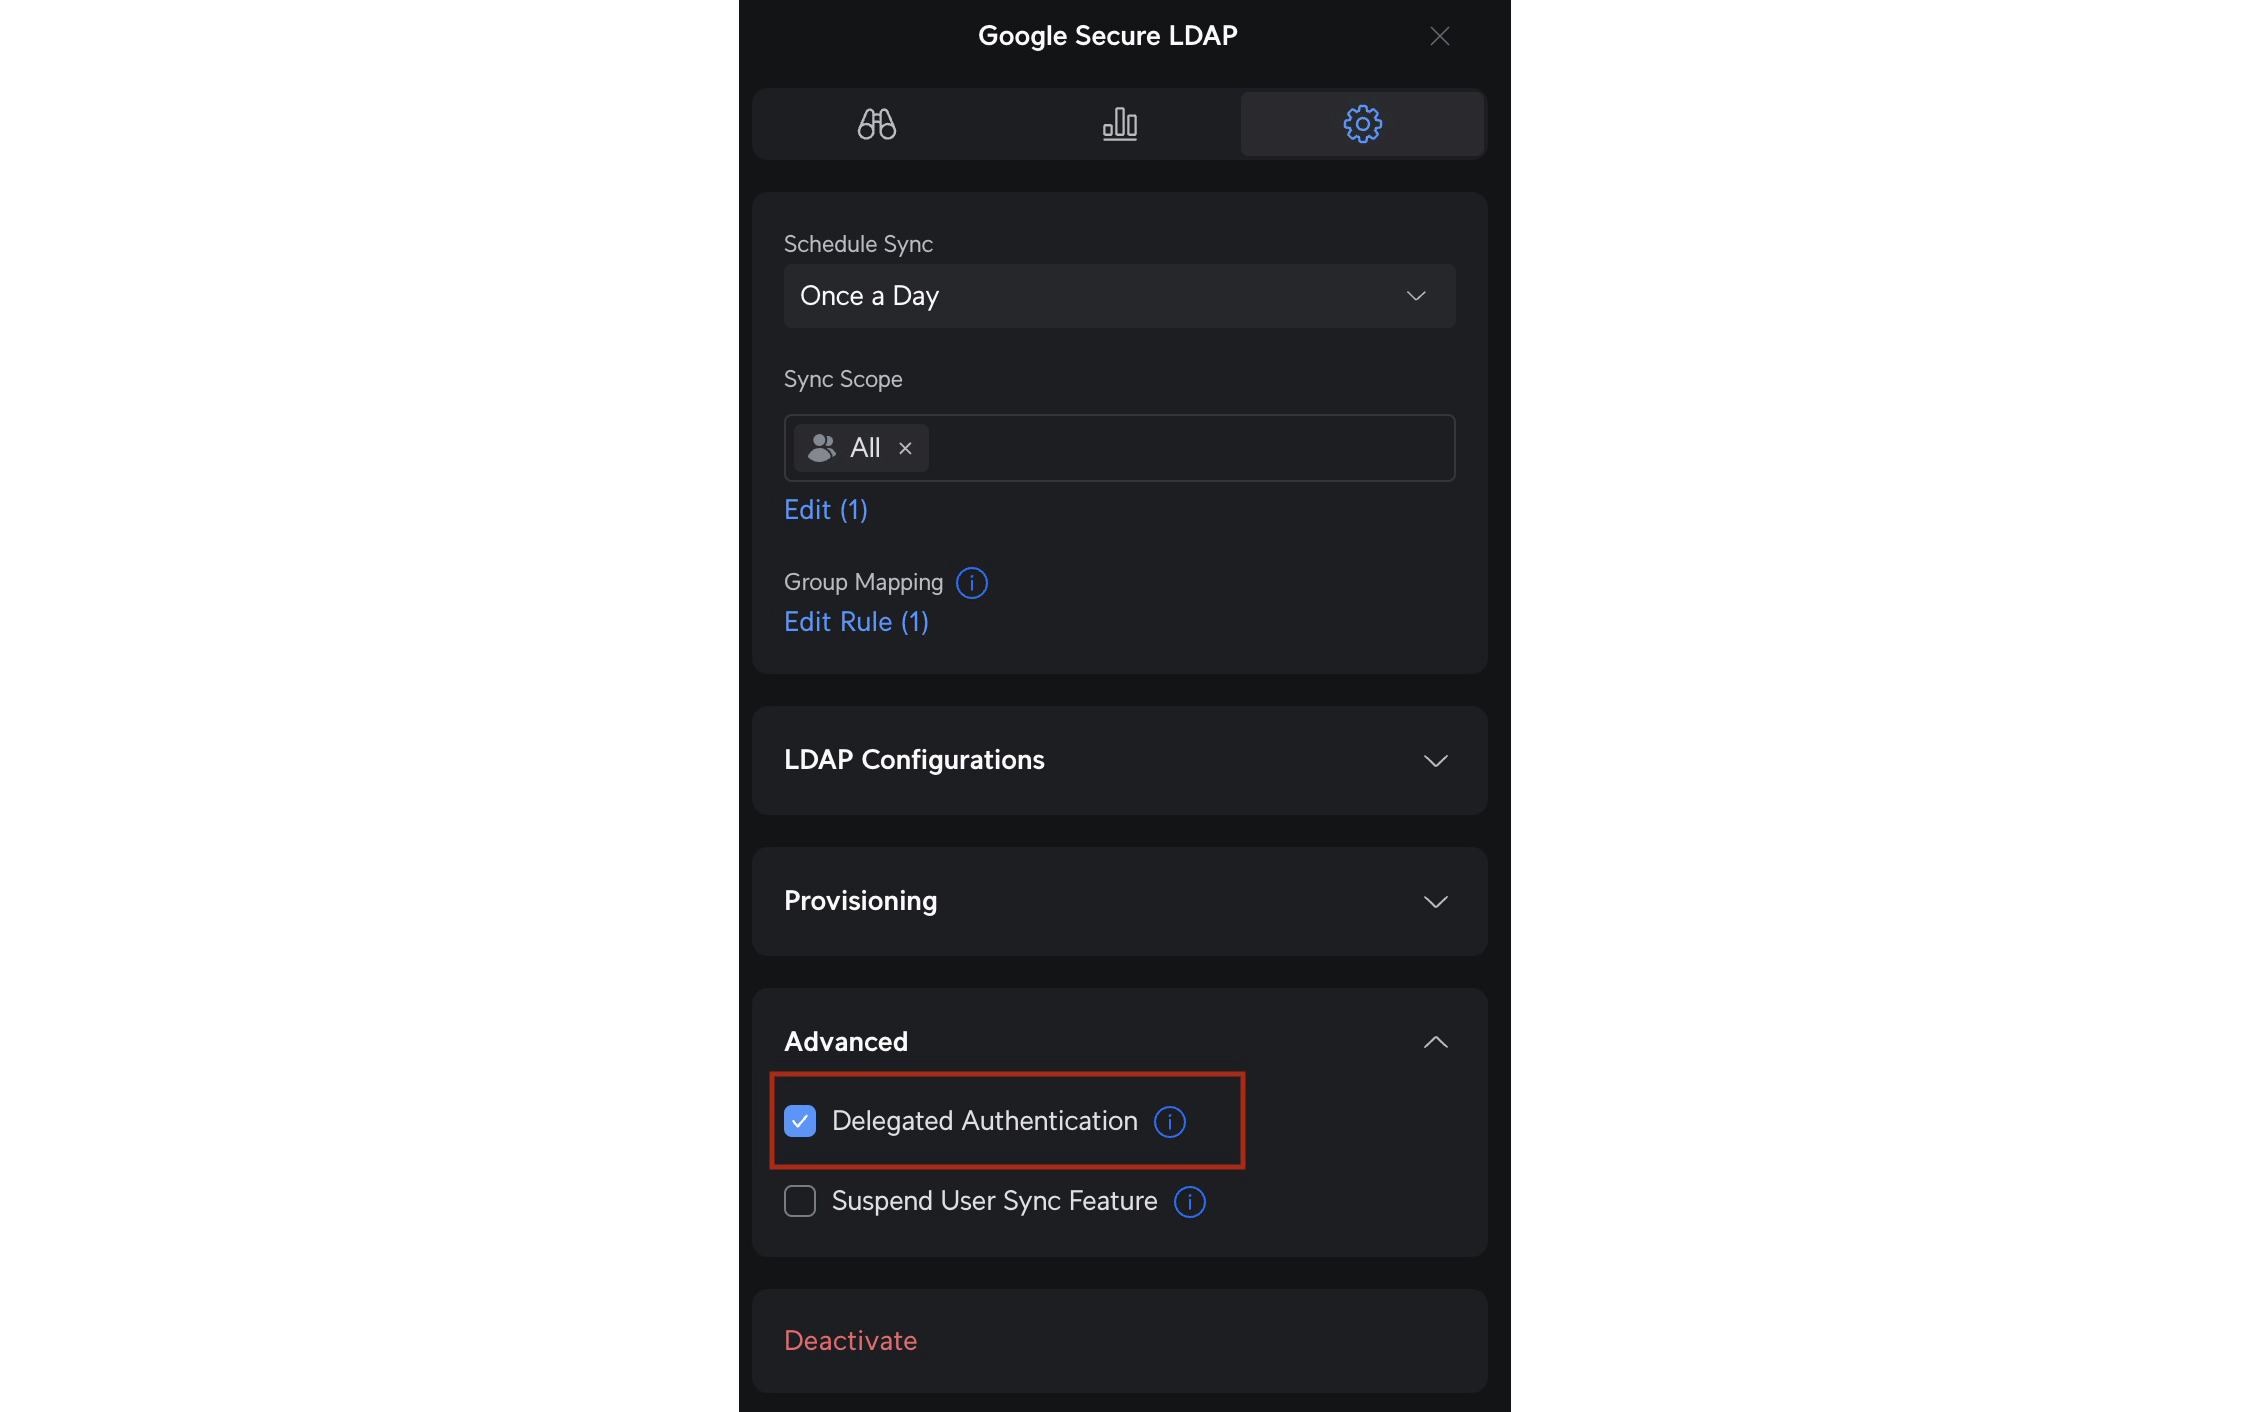
Delegated Authentication Setup
Ready to let users log in with their Google accounts? Here’s how:
- In the UniFi Identity Endpoint settings, find and select Advanced Settings.
- Turn on Delegated Authentication.
Once done, you’ll see the synchronized user count and LDAP details in the interface. Users will receive onboarding emails, making their setup experience a breeze.
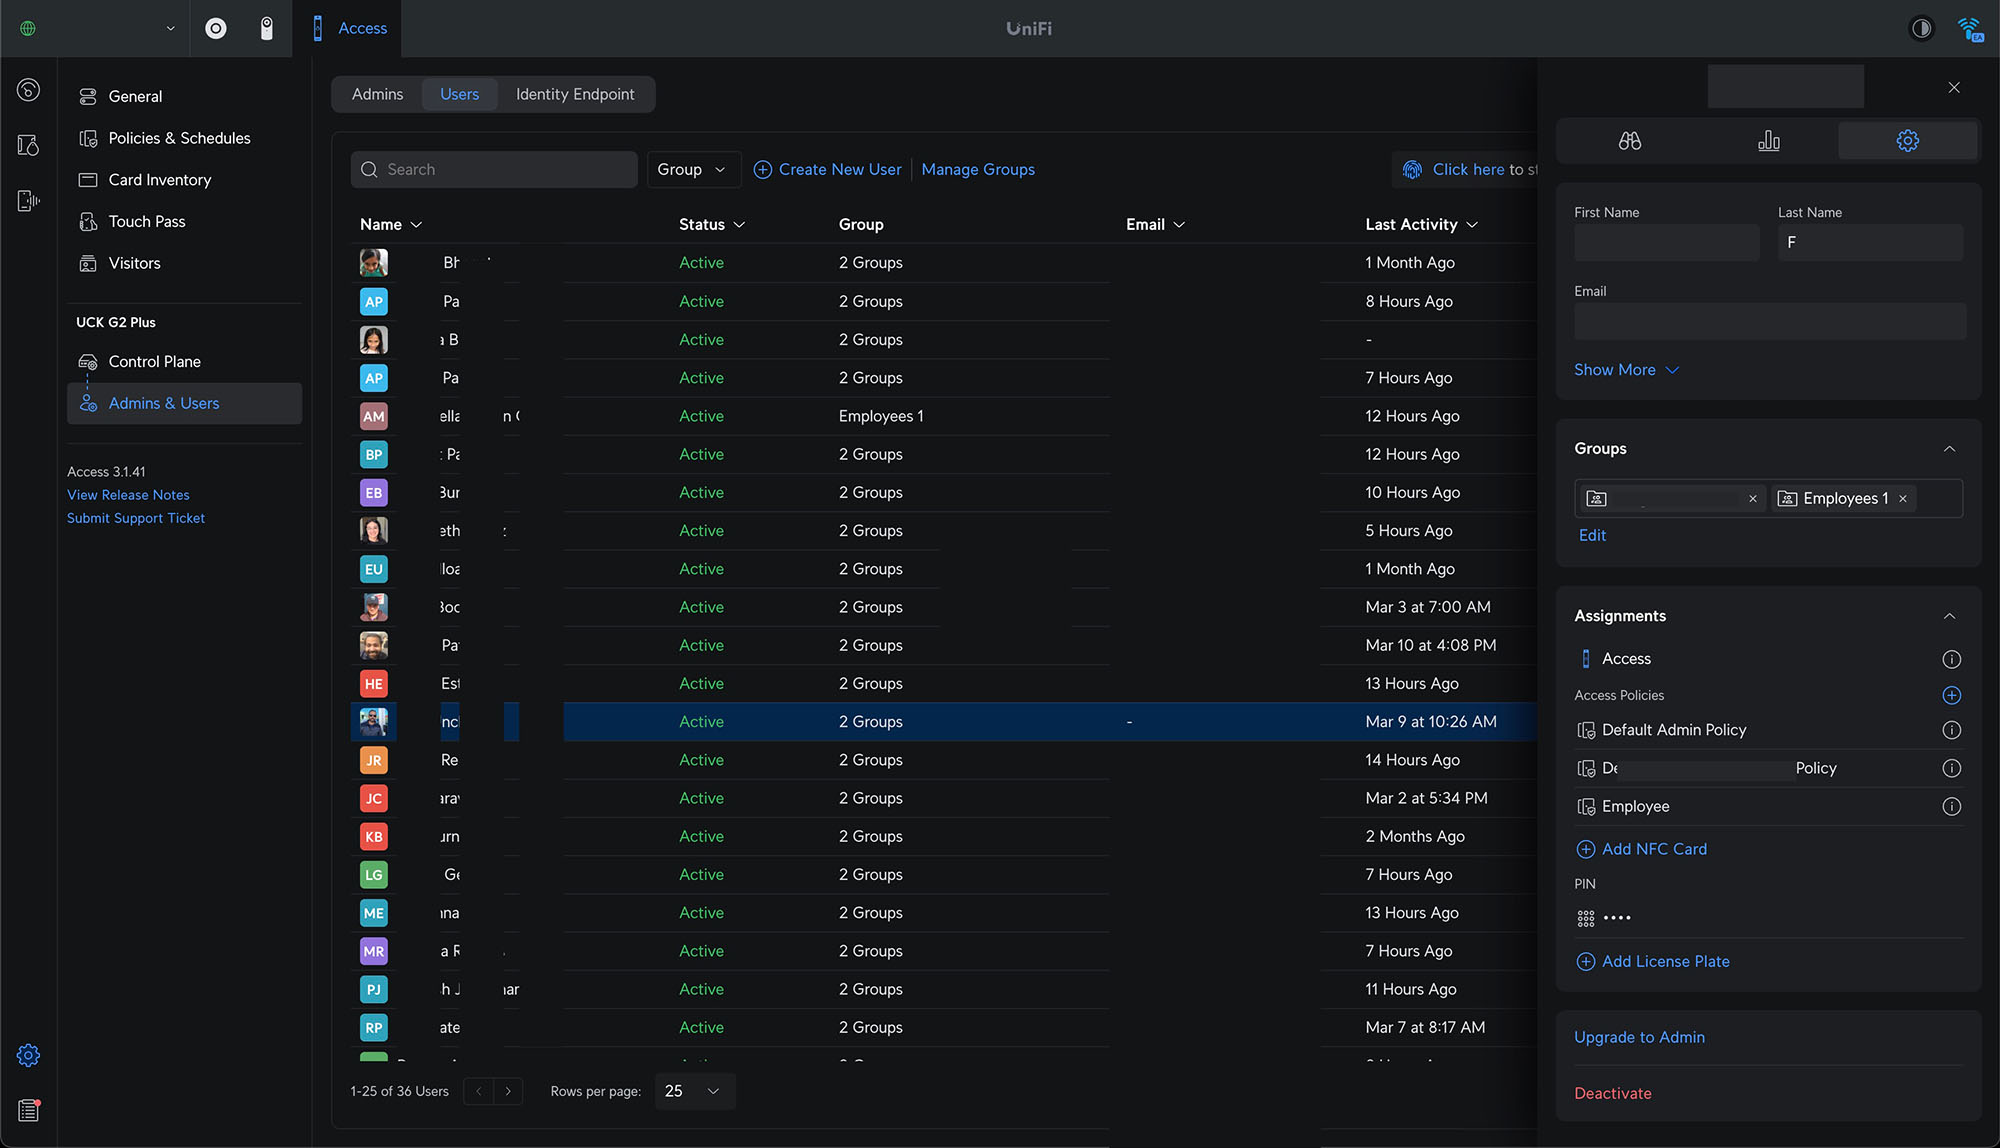
Managing Users in UniFi Identity
Head to the Users tab to see synchronized users and their groups. Admins can tweak group assignments, update policies, or resend onboarding emails whenever needed.
We’ve seen firsthand how UniFi Identity Endpoint transforms onboarding and management for our clients - and we’re confident it’ll do the same for you. Need help integrating Ubiquiti UniFi solutions into your organization? We’re here to make it smooth and painless.